Lower frigid temps had me craving for something sweet and since I've been on this green tea kick, I decided to incorporate it into a modern cheesecake! Some of you may know I'm not a finessed baker, so I'm always in my kitchen trying to hone in on my skills within the baking department. I pulled a recipe from A Cozy Kitchen for my first attempt at a matcha cheesecake.
Matcha Swirl Cheesecake

Matcha Swirl Cheesecake. Recipe from A Cozy Kitchen. All photos by: © Suzanne Spiegoski
Recipe from A Cozy Kitchen
Prep Time: 20 minutes
Cook Time: 45 minutes
Total Time: 1 hour, 5 minutes
Yield: 1 (nine-inch) cheesecake
Serving Size: 8
Ingredients
Crust:
- 1 1/4 cups (about 16 cookies) chocolate cookie crumbs
- 2 tablespoons white granulated sugar
- 1/4 teaspoon salt
- 4 tablespoons unsalted butter, melted and cooled slightly
Cheesecake:
- 24 ounces cream cheese, room temperature
- 4 ounces (European-style, not Greek) yogurt, room temperature, divided
- 2 tablespoons green Matcha powder
- 1 1/2 cups white granulated sugar
- 4 large eggs
- 1/4 teaspoon pure vanilla extract
- Pinch of salt
Swirl (optional)
- 1 ounce (European-Style, not Greek) yogurt
- 1 tablespoon powdered sugar
Directions
- Preheat the oven to 350 degrees F. In a small bowl, mix together the cookie crumbs, sugar, salt and melted butter. Add the crust mixture into a nine-inch (10-cup) springform pan and press evenly onto the bottom of the pan until packed tightly. Transfer to the oven to bake for 8-10 minutes (unfortunately since the crumbs are so dark you can’t really tell when they’ve toasted so it’s important to pay attention to the clock). Remove from the oven and cool completely before adding the filling. Wrap the bottom of the spring form pan in a few sheets of foil and set aside.
- In a small bowl, whisk together the matcha with 1 ounce of yogurt until very smooth—be sure to really get in there to whisk out the lumps of matcha. To the bowl of a stand-up mixer, using a paddle attachment, add the cream cheese and beat until smooth and fluffy, about 2 minutes. Next, add in the matcha yogurt mixture, reserved 3 ounces yogurt and sugar; beat until combined. With the machine one, add the eggs, one at a time, waiting until each egg is incorporated before adding the next one. Lastly, mix in the pure vanilla extract and salt.
- To a small bowl, whisk together the yogurt and powdered sugar until smooth. If it’s thick at all (this will depend on the yogurt you’re using), you may need to add a splash of water. It should be the texture of heavy cream.
- Pour the matcha and cream cheese filling into the springform pan and smooth out the top with a spatula. Make sure it reaches the edge of the pan. Make little dollops of sweetened yogurt all over the surface of the cream cheese. Take a skewer or popsicle stick and run it through the dollops creating a marbling effect. Make it as messy or neat as you like. Place the springform pan in a roasting pan or another pan that’s as big. Transfer to the rack of the oven and fill up the roasting pan with about 2 inches of water. Bake for 45 to 50 minutes, until it looks set, yet it’s still a bit wobbly in the center. Place on a cooling rack for 30 minutes and then place it in the fridge to set for at least 3 hours. (I let it set overnight.) Slice it up and serve.

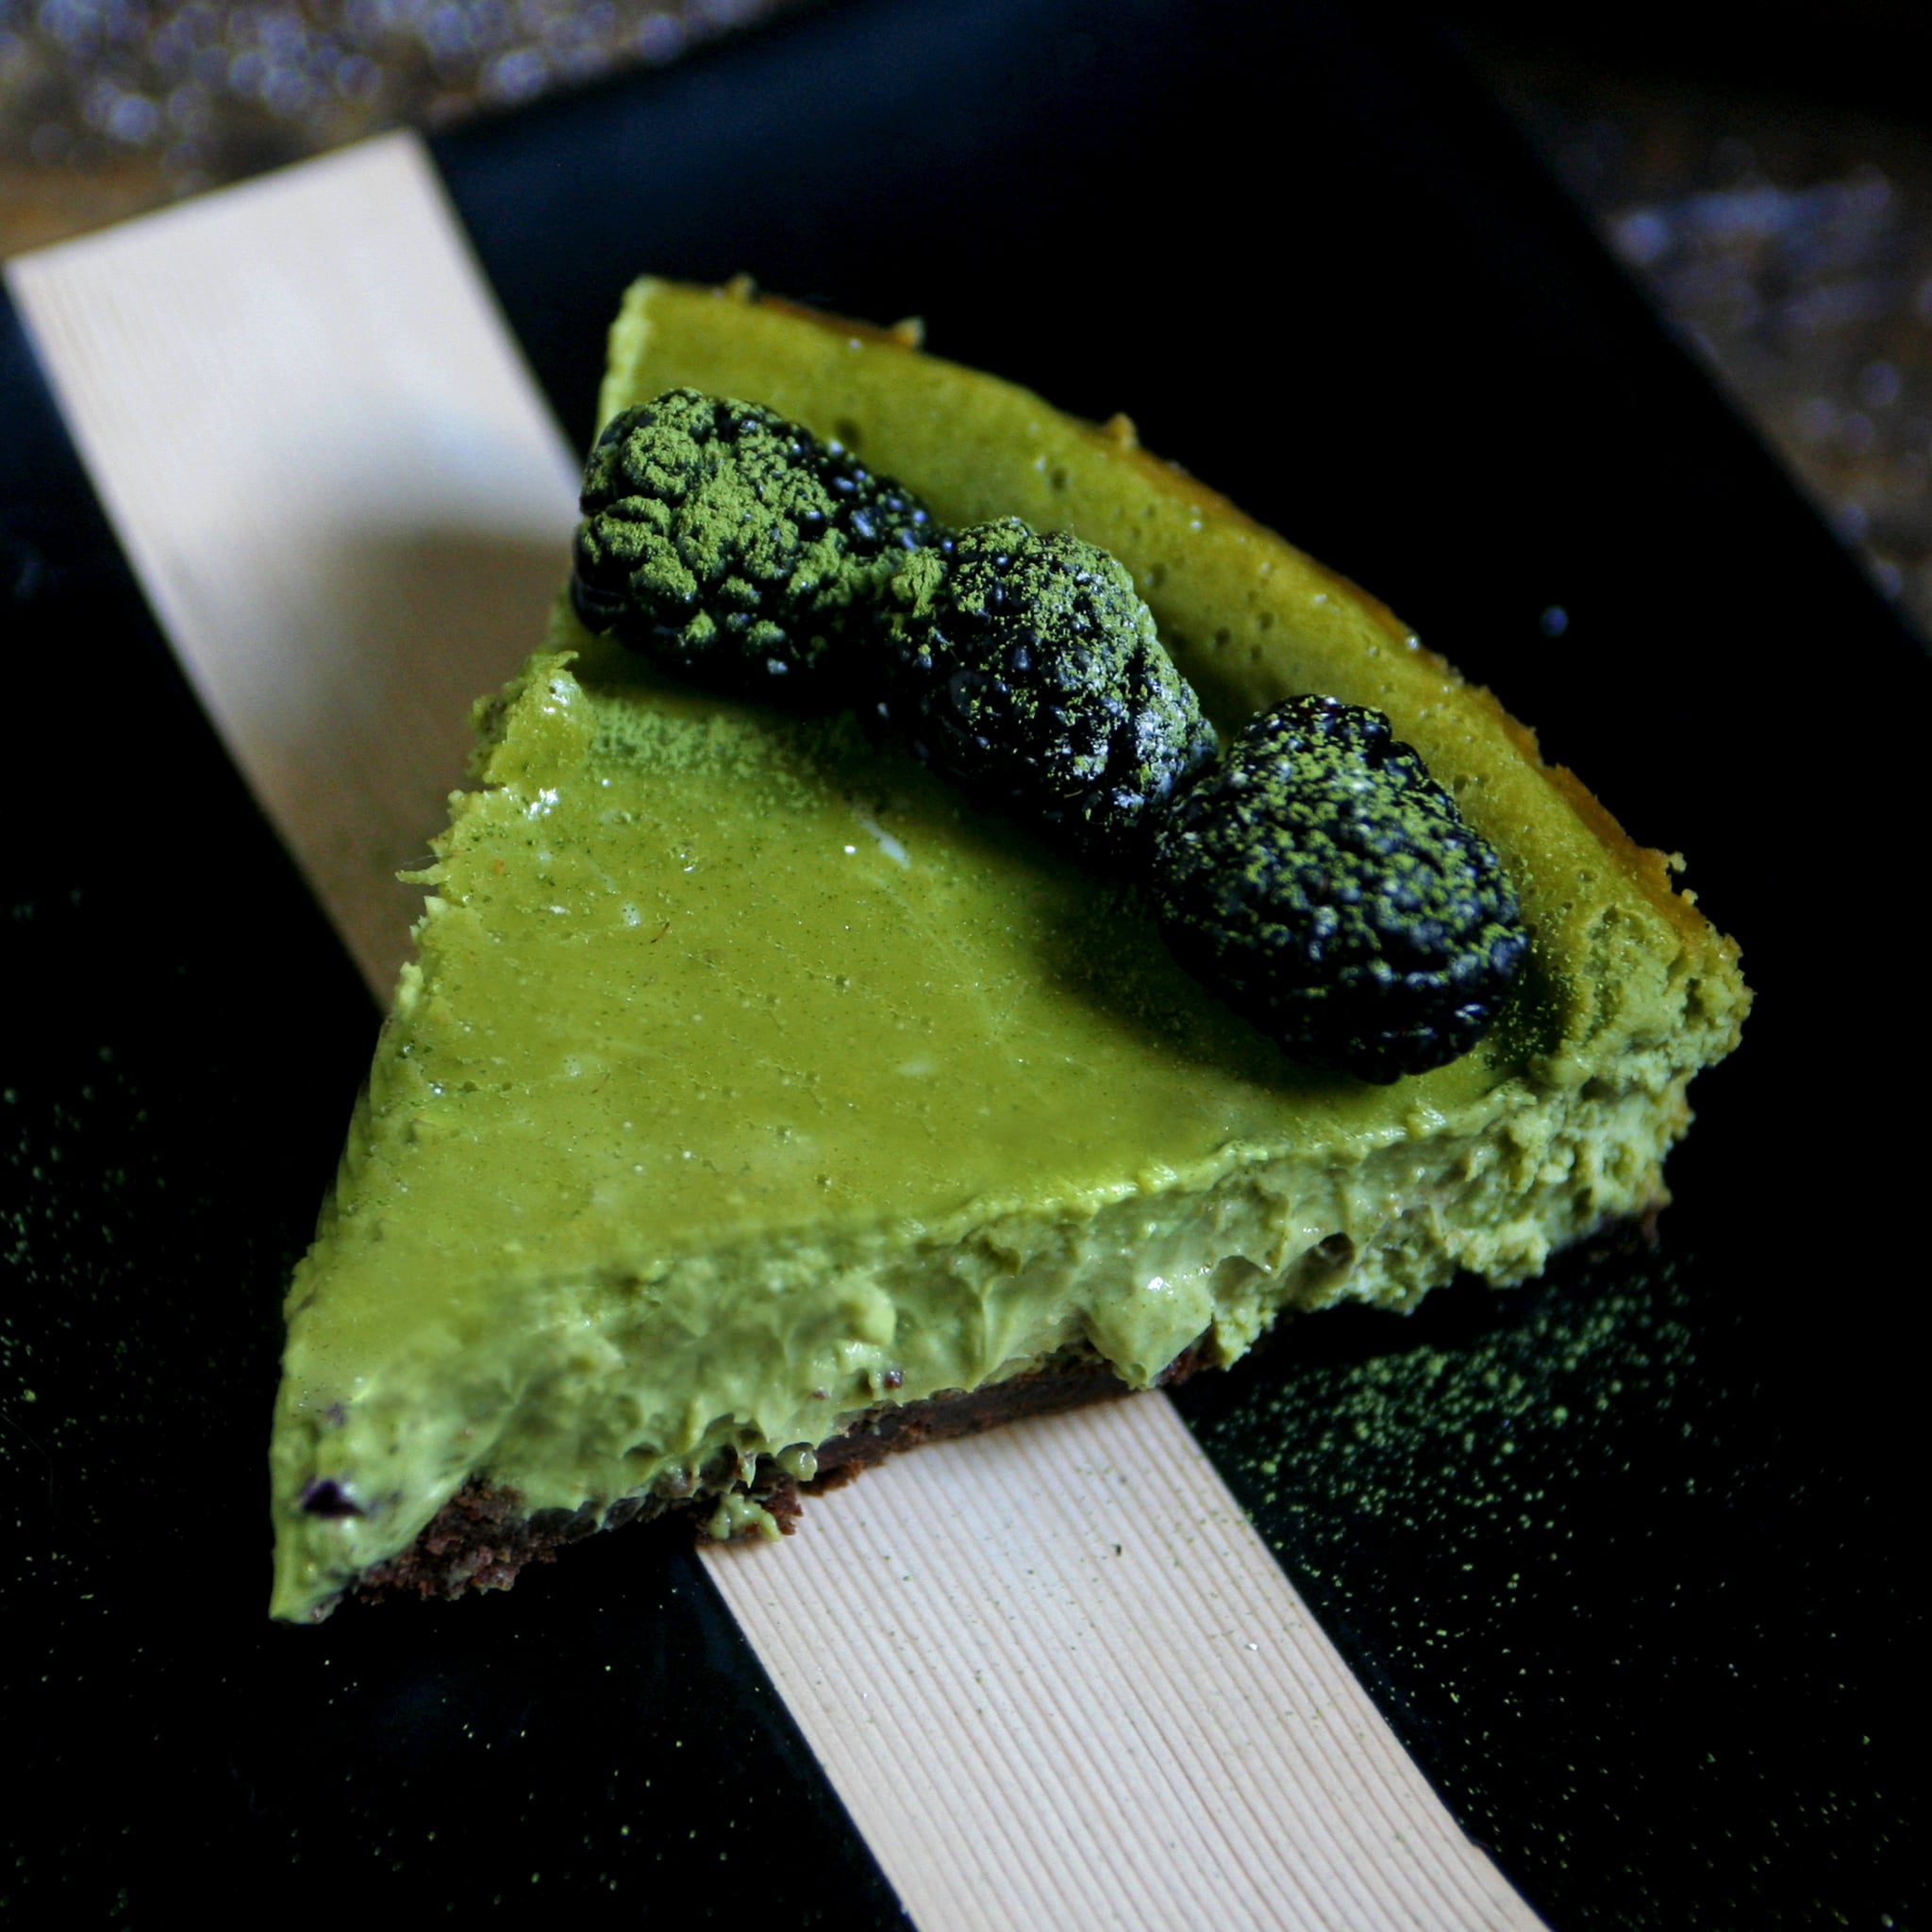
Sinfully decked out in blackberries. I just love a high contrast in colors!
Cheesecake can be slightly difficult to make, being how easy it is to crack the beautiful dessert. But you can still say no to crack if you follow these tips! NEVER open your oven while the cheesecake is baking. The air and change in temperature will ruin it indefinitely. Make sure to wrap your sweetness in aluminum foil. This will trap the heat and prevent the cheesecake from being overcooked. And lastly, make sure it's being 'bathed' in water, as this also preserves the heat from accelerating too fast and therefore burning the crap out of it.

This matcha cheesecake is to die for! I put in a tad extra green tea powder for more vibrancy with the coloring.
I also added some blackberries for aesthetics and added flavor and texture. The fruit brings an acidic pop to the already very rich cheesecake. I always hate it when a dessert is way too sweet, overpowering any other taste but sugar. Blech! Doesn't it look appealing decorated in the center? I love the deep contrast in color!
You want a piece of me?
For the crust, the cookies I used were chocolate Teddy Grahams. They came out very leveled and super tight. Look at the cut on the cheesecake, I'm getting hungry! Perhaps a little side dessert with lunch today? ;-)

Black and green never looked so good together.
What's your favorite kind of cheesecake? I would've made a classic New York-style cheesecake but I wanted to do something a little more innovative - something I've also never tried making before. Let's just say the results were beyond delish! Happy Baking & Happy Hump Day! Stay warm friends. ♥