Raspberry White Chocolate Scones

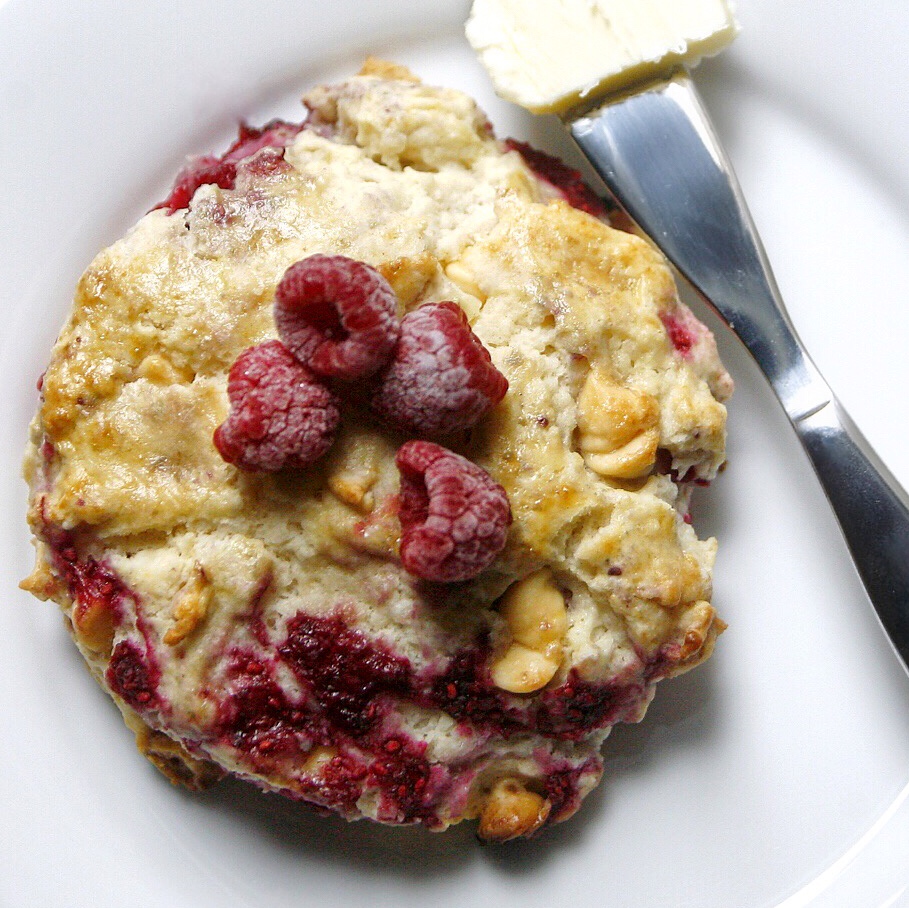
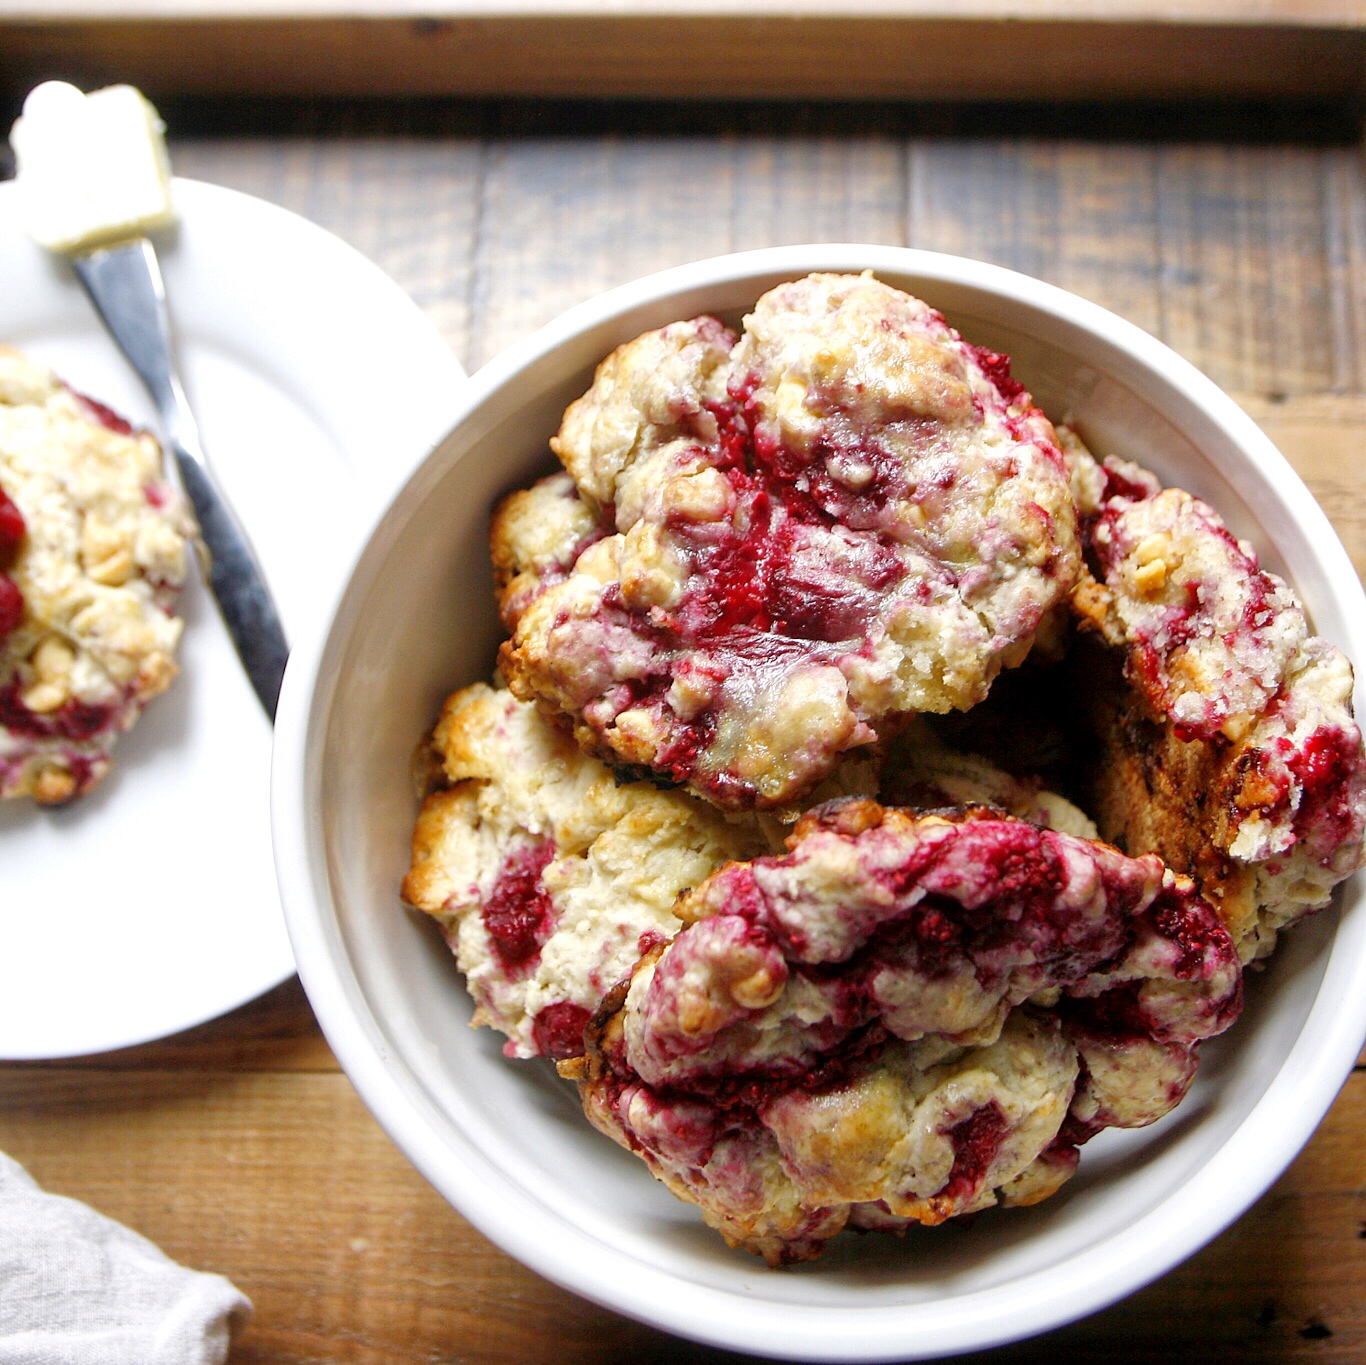
Happy First Day of Fall! In honor of my favorite season, I started the morning off right with one of my favorite pastries. Scones! And the ultimate combo: a raspberry white chocolate match made in heaven! These are literally the best scones I've ever made, all thanks to Rock Recipes!

Print Recipe

RASPBERRY WHITE CHOCOLATE SCONES RECIPE

Hands down the best scones I've ever made! Thanks Rock Recipes!

Prep: 15 mins Cook: 25 mins Total: 40 mins

Ingredients:

    3 cups flour
    ½ cup sugar
    6 tsp baking powder
    ½ tsp salt
    ¾ cup very cold butter, cubed
    6 ounces good quality chopped white chocolate
    2 tbsp lemon juice
    2 tsp vanilla extract
    1 cup milk
    1½ cups frozen raspberries

Instructions

  •     I start these in my food processor because it is so fast but they can be made just as easily in a large bowl by cutting the butter in with a pastry blender or even 2 knifes held between the fingers.
  •     In a food processor, combine the flour, sugar, baking powder and salt.
  •     Pulse in the cold butter until this mixture resembles a coarse meal. It is very important that pea sized pieces of butter remain in this mixture.
  •     Transfer to a large bowl and toss in the white chocolate.
  •     Mix together the lemon juice, vanilla extract ans milk.
  •     Pour this over the surface of the dry mixture. Toss all together gently with a fork only enough to form a dough ball.
  •     When the flour is almost incorporated, add the frozen raspberries.
  •     Frozen berries work best because they are less delicate and easier to incorporate into the scone dough.
  •     It is important that you work this dough as little as possible or the finished scones will be too dense and heavy.
  •     Roll to 1 inch thickness and cut out scones with biscuit cutter or in triangles with a sharp knife and place on parchment lined baking sheet.
  •     If desired you can brush the tops of the scones with an egg wash of 1 egg beaten together with 1 tbsp water.
  •     You can sprinkle the tops with turbinado sugar if desired but this is, of course, optional.
  •     Bake at 375 degrees F for 25 minutes or until light golden brown. Baking time will vary depending on the size of your biscuit cutter.

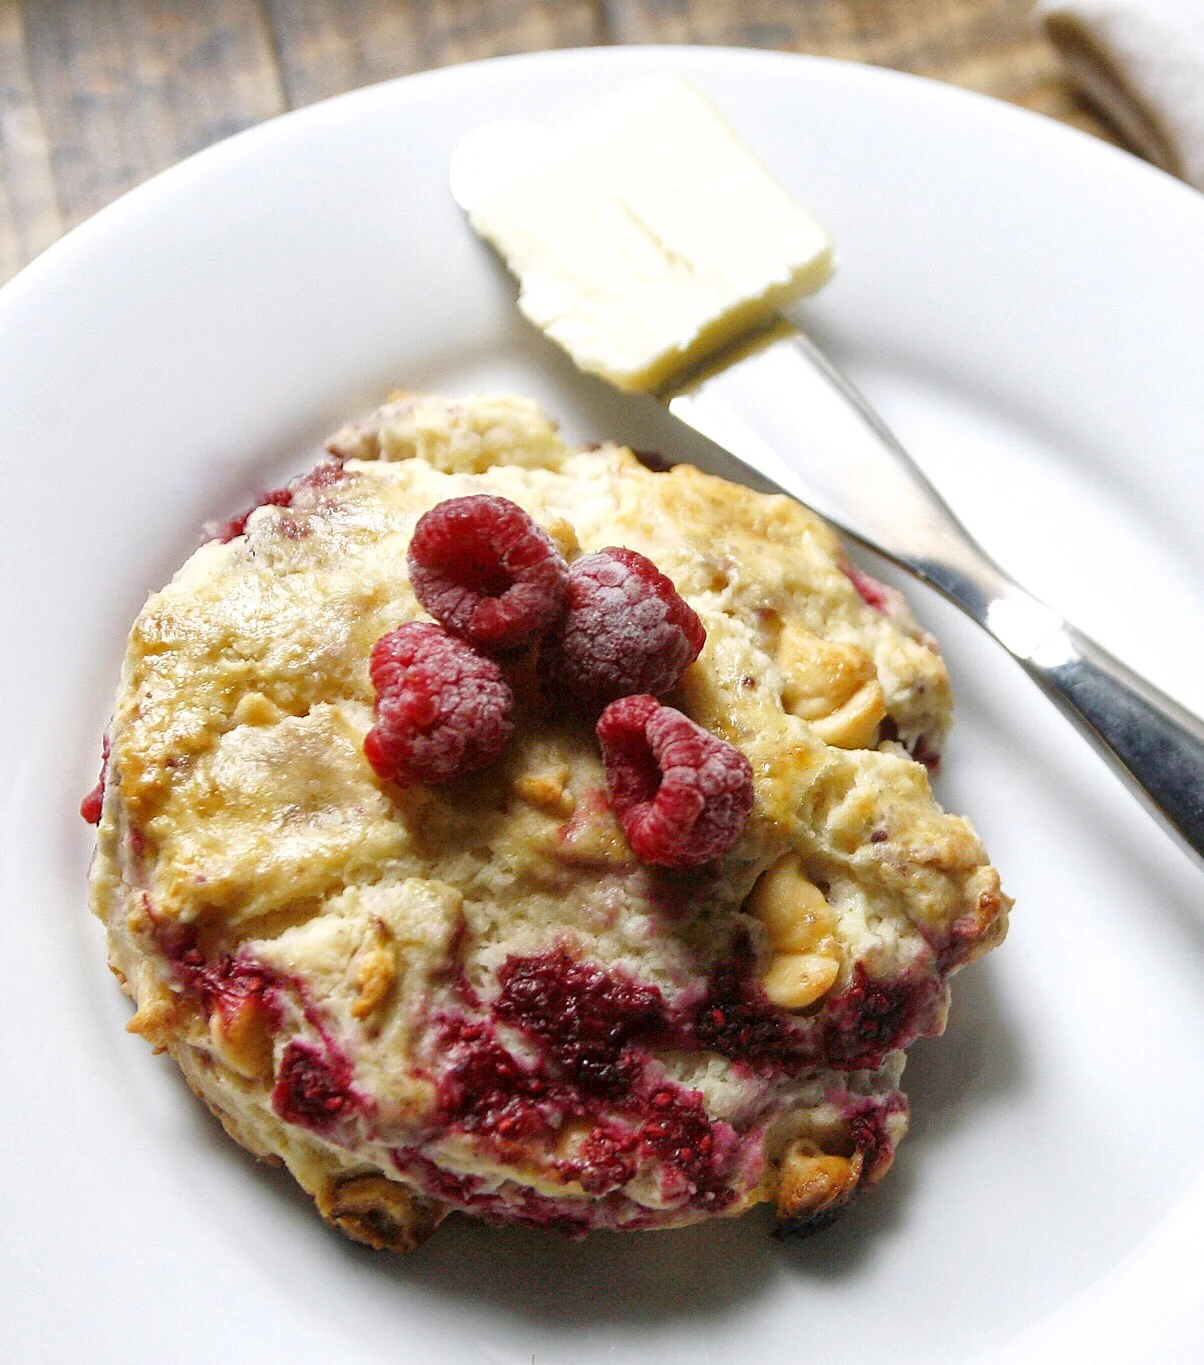
Drooling yet? I don't know about y'all but for me, butter is mandatory with scones! So yummy!

I can definitely attest to my hubby's full, content belly. I've already had two with coffee!

What is your favorite kind of scone? Got a killer combination? We'd love to hear about it!

maQ went crazy over the aroma in our apartment. It smells like the most divine bakery right now! Don't you love that after baking? :) We hope, whatever you decide to do to enjoy the first day of Autumn, is a happy, delicious one! We plan to get outside after work! Cheers to the best season!

Love & xx's,

maQ + suz

Friday Stir-Fry

Today on the blog, we have a super delicious, healthy meal you can make in less than 30 minutes! And that includes the marinade time! A perfect recipe for a busy Friday, whether it's lunch or dinner, or if you're planning on going out or staying in!

I make this beef stir-fry on a consistent basis, especially during the chillier seasons, and have been using this recipe for years. It is originally from the amazing Gimme Some Oven food blog, though I've adjusted a couple of items such an opting out on shiitake mushrooms and what to serve it with. You can have any type of rice, quinoa or even noodles with this dish, but being part Korean, Korean sticky rice is what I call for. It's the only rice I use in Asian cuisine. 

This is such a quick and easy recipe. I know some of you may not be a fan of kale, but don't knock it till you try it! It goes perfect with the ginger beef and none of the flavors are overpowering. They are all there and so-so good! Check out some of the photos I took of this yummy dish! Mmm...

Print Recipe

Ginger Beef, Mushroom & Kale Stir-Fry

This delicious ginger beef, mushroom, and kale stir fry is quick to make and full of great flavor!

Prep: 5 mins Cook: 25 mins Total: 30 mins

Ingredients:

Marinade Ingredients:

  • 1/3 cup soy sauce
  • 1/2 cup vegetable broth (or chicken/beef broth, or water)
  • 3 Tbsp. rice wine vinegar
  • 2 Tbsp. corn starch
  • 2 tsp. ground ginger
  • 1/4 tsp. freshly-ground black pepper

Stir-Fry Ingredients:

  • 1 lb. thinly sliced flank steak or sirloin, cut diagonally across the grain into thin strips
  • 2 garlic cloves, minced
  • 2 Tbsp. olive oil
  • 10 ounces baby portobello or button mushrooms, halved
  • 3 cups chopped kale
  • 2 green onions, thinly sliced

Directions:

To Make The Marinade:

Add all marinade ingredients to a bowl and whisk to combine. Pour marinade into a large bowl or ziplock bag, then add in the steak and gently toss to combine. Cover/seal and refrigerate for at least 15 minutes.

To Make The Stir-Fry:

Once steak has marinated, heat 1 Tbsp. oil in a large saute pan over medium-high heat. Remove steak from marinade with a slotted spoon, reserving the marinade, and add to saute pan with garlic. Saute for about 2-3 minutes until browned, stirring occasionally. Remove steak with a slotted spoon and set aside.

Add mushrooms, kale, and reserved marinade to saute pan, and stir to combine. Cook for 3-4 minutes, until the kale is wilted, the sauce has thickened, and the mushrooms have cooked, stirring regularly so that sauce does not burn. Add in the steak, and toss to combine.

Serve immediately over sticky rice, garnished with chopped green onions.

I think my favorite part after cooking is not to taste, but to relish with the idea of it while I photograph whatever dish I've just made. It makes the first bite that more enticing. I'm already salivating at the mouth just writing about it!

Alright, that's it! I have to dig in. Bon Appetit! :)

We hope everyone has a great weekend! Catch y'all on Monday, where we will be doing our first giveaway! Stay tuned to find out what it is and how to enter your chance to win! It's going to be oh so chic!

Love & xx's,

maQ + suz

Pasta Pasta Pasta!

This week's recipe is from one of my favorite Italian chefs, Lidia Bastianich! I have cooked so many of her recipes through the years and of course, I wanted to blog about my experience with one of her pasta recipes. 

This tomato-based rigatoni dish is perfection. With its deep blend of flavors from the sausage, the basil, and cheese, the zucchini and peperoncino flakes complete its magic in the pasta, giving it texture and an extra kick.

Print Recipe

Rigatoni with Sausage-Tomato Sauce

Serves 8

Ingredients

1 1/2 pounds sweet Italian sausage
1 cup white wine, divided
2 tablespoons extra-virgin olive oil, plus more for finishing the sauce
2 cups onions, chopped
1 garlic clove, peeled and sliced
1/2 teaspoon kosher salt, plus more for the pasta pot
1/2 teaspoon peperoncino flakes, or to taste
1 cup zucchini, diced
6 cups canned Italian plum tomatoes, preferably San Marzano, crushed by hand
1 branch fresh basil, with lots of leaves
1 pound rigatoni
1 cup Grana Padano, freshly grated, plus more for passing
 

Preparation

Remove the sausage casings, and crumble the meat into a large bowl. Pour 1/2 cup of the wine over the meat and mix this in with your fingers, breaking up any big meat clumps, so the sausage is evenly moistened.

Pour the olive oil into the big skillet and set it over medium heat. Stir in the onions and cook until they begin to soften, about 5 minutes. Scatter the sliced garlic in the pan and season with the salt and peperoncino. When everything is sizzling, crumble in the sausage and stir with the onions. Pour in the remaining 1/2 cup wine, raise the heat a bit and cook, stirring, as the wine cooks away and the sausage becomes all browned, about 10 minutes. Add in the diced zucchini and stir to incorporate. Pour in the tomatoes and a cup of water (which you’ve used to slosh and rinse the tomato cans and bowl). Submerge the basil branch in the liquid, cover the skillet and bring to a boil. Set the cover ajar, adjust the heat to keep the sauce bubbling steadily and cook for an hour or more, until the sauce has developed good flavor and reduced to the consistency you like for dressing pasta. Remove and discard basil branch. You can use some of the sauce right away—you’ll need half of it to dress the rigatoni—or let it cool, then refrigerate or freeze for later use.

For cooking and dressing the pasta, bring a large pot of well-salted water (at least 7 quarts water with 1 1/2 tablespoons kosher salt) to a rolling boil. Heat half the sausage-tomato sauce, about 4 cups, to a bare simmer in a wide skillet or sauté pan (if you’ve just made the sauce, use the same pan). If the sauce has cooled and thickened, loosen it with some of the pasta water. Add the rigatoni to the boiling water, and cook until just al dente.

Lift out the pasta in big bunches with a spider, let drain for a moment, then spill them into the simmering sauce. Over low heat, toss the rigatoni and sauce together for a minute or two, until all are coated and perfectly al dente. (Thin the sauce, if necessary, with hot pasta water or thicken it quickly over higher heat.) Turn off the heat, and sprinkle the grated cheese over the rigatoni and toss well. Finish with a drizzle of olive oil, toss again and heap the pasta in warm bowls. Serve immediately, passing more cheese at the table.

I love this recipe because it's quick and easy, and it's the ideal comfort food. Trust me when I say this, this pasta is really super delicious! I was salivating while shooting the photos- I couldn't stand to wait and eat it! Don't forget the wine and bread! I know some of you will think I'm bonkers for having bread with pasta, but I grew up eating like this and I love it. So extra yummy when you dip it in the sauce! ;P

Lastly, for a really adorable, entertaining video of Lidia, Rachel Ray and Nate Berkus working in the kitchen on this recipe, click here for lots of laughs and more! Seriously, Nate... you and the sausage! OMG! HA HA HA!

Until next time, have a great weekend everybody!

Love & xx's,

maQ + suz

Let's connect!

Celebrating 2,500+ Followers!

That's right! You've heard it here first folks- my German Shepherd, maQ has over 2,500 followers on Instagram! Never seen his feed? We got tons of portraits, goofy bloopers & videos, and all those heart-warming, fuzzy and glorious moments for any dog lover! You can check us out @maq_life over on IG!

Gallery Block
This is an example. To display your Instagram posts, double-click here to add an account or select an existing connected account. Learn more

This deserves a celebration! Seriously though, I can't thank each and every one of you enough for all your love and support. It is so amazing getting to know some of you. I've even met a few of our fellow Instagram followers in person and am so delighted in the idea of making new friends via social media. We literally have friends from all around the globe! From South Africa to Australia, to NJ and Cali, we have sheppy friends everywhere we go! In honor of our followers, I wanted to make something special for my fur baby.

maQ is a life-size wolf and horks down dog biscuits like it's his job. Since I spend so much money on trying a variety of dog treats, and not knowing what ingredients are really going into my poochie's delicate belly, after awhile I figured why not make my own? I can make them by the bulk and for way less than the prices at any retail store. Plus, I know exactly what kind of ingredients I'm using and they're truly healthy for maQ! You know what really made my day? These cookie cutters from Sur La Table. I went down to Soho in search of a dog bone-shaped cutter along with something a little more unique and creative. Lo and behold they had GERMAN SHEPHERD DOG cookie cutters! I literally gasped while in the store when I discovered them! I I searched deep in every nook and cranny before finding it. Luckily, I got the last one! It was totally satisfying, ha ha! No surprise they're popular... check out how freaking adorable they are! I wish I could send these cookies to all my furriends! I did get a chance to share a few with some of maQ's doggy buddies and they too loved the heck outta em'!

Since I've never made dog treats before, I'm using a recipe from http://damndelicious.net/2015/01/07/homemade-peanut-butter-dog-treats/ This was a huge success, to say at the very least! Thank you for sharing this with us!

Print Recipe
IMG_2330.JPG

Homemade Peanut Butter Dog Treats

Prep Time 25 minutes

Cook Time 25 minutes

Total Time 50 minutes

The easiest homemade dog treats ever - simply mix, roll and cut. Easy peasy, and so much healthier than store-bought!

Ingredients

  • 2/3 cup pumpkin puree
  • 1/4 cup peanut butter
  • 2 large eggs
  • 3 cups whole wheat flour, or more, as needed

Instructions

  • Preheat oven to 350 degrees F. Line a baking sheet with parchment paper or a silicone baking mat; set aside.
  • In the bowl of an electric mixer fitted with the paddle attachment, beat pumpkin puree, peanut butter and eggs on medium-high until well combined, about 1-2 minutes. Gradually add 2 1/2 cups flour at low speed, beating just until incorporated. Add an additional 1/4 cup flour at a time just until the dough is no longer sticky.
  • Working on a lightly floured surface, knead the dough 3-4 times until it comes together. Using a rolling pin, roll the dough to 1/4-inch thickness. Using cookie cutters, cut out desired shapes and place onto the prepared baking sheet.
  • Place into oven and bake until the edges are golden brown, about 20-25 minutes.*
  • Let cool completely.

Notes

*Baking time will vary depending on the size and thickness of the treats. Serving size will also vary depending on the desired shapes and cookie cutters used.

Adapted from use real butter

maQ clearly enjoying his treat! :)

maQ clearly enjoying his treat! :)

Please like, share and comment below! If you've got a snazzy dog treat recipe, we'd love to hear from you!

Wishing you all a lovely Thursday, friends!

Love & xx's,

maQ + suz

Breakfast Taco Tuesday Recipe

Summer's coming to a close and I'm trying to use up all the 'fruits' of my friend's labor. He has one killer garden on the rooftop of our apartment building. We actually spent the 4th of July up there with a bunch of neighbors and friends and watched the fireworks. This past weekend he gifted us a gigantic bag of tomatoes and I'm trying to use as much as I can before they start to get old. I hate wasting food!

Ever since I was a little girl I despised breakfast. To be honest, for several years, my ideal 'breakfast of champions' was coffee & cigarettes. For a long time, the very thought of eating something in the morning revolted me. Now older, I'm trying to take better care of myself and have really gotten in the habit to eat 3-square meals a day. However, when I'm having a good writing day, I can't move, let alone bother to feed myself, and yes, still will sometimes skip a meal if it's going very well. I'll always stay hydrated though. Fun fact: I haven't had a soda in 2 months! Keeping it healthy with water and non-sugary drinks!

One of my favorite quick-and-easy, on-the-go breakfasts are tacos! Yes, I'm one of those New Yorkers who's running around while simultaneously shoving food into my mouth.

Check out the recipe and photos below.

Let's Eat!

Print recipe

Breakfast Tacos (Serves 4)

4  flour tortillas (8 inches) 

1  cup canned refried beans 

1  tablespoon butter 

8  eggs, beaten to mix 

Salt and pepper, to taste 

1  cup shredded Sharp Cheddar cheese

12  cherry tomatoes, halved 

1. To heat the tortillas: Place a tortilla directly on a medium gas flame for a few seconds, or until it starts to puff and is slightly charred at the edges. Using tongs, turn it and let it heat for a few seconds on the other side. Or, heat the tortillas in a heavy, ungreased skillet over medium heat. On a plate lined with a cloth napkin, stack the tortillas and fold the napkin over them to keep them warm. Continue until all the tortillas are warm.

2. In a saucepan over medium heat, warm the refried beans, stirring often, until they are hot.

3. In a skillet over medium-low heat, melt the butter. Add the eggs, salt, and pepper. With a large spoon, stir the eggs until they form small curds.

4. On each of 4 breakfast plates, set 1 tortilla. Spread with 2 tablespoons of beans, 1/4 of the eggs, 2 tablespoons of cheese, and 6 cherry tomato halves. Fold in half. Repeat with remaining tortillas and filling.

* You can also add in salsa, onion, avocado, bacon/sausage etc. Use what you like! :)

Enjoy!

Love & xx's,

maQ + suz