Stuffed Mushrooms with Cameron Hughes Wine

Thank you Cameron Hughes for sponsoring this post. Capture the celebratory spirit of the holidays, and toast to the season with Cameron Hughes wine!

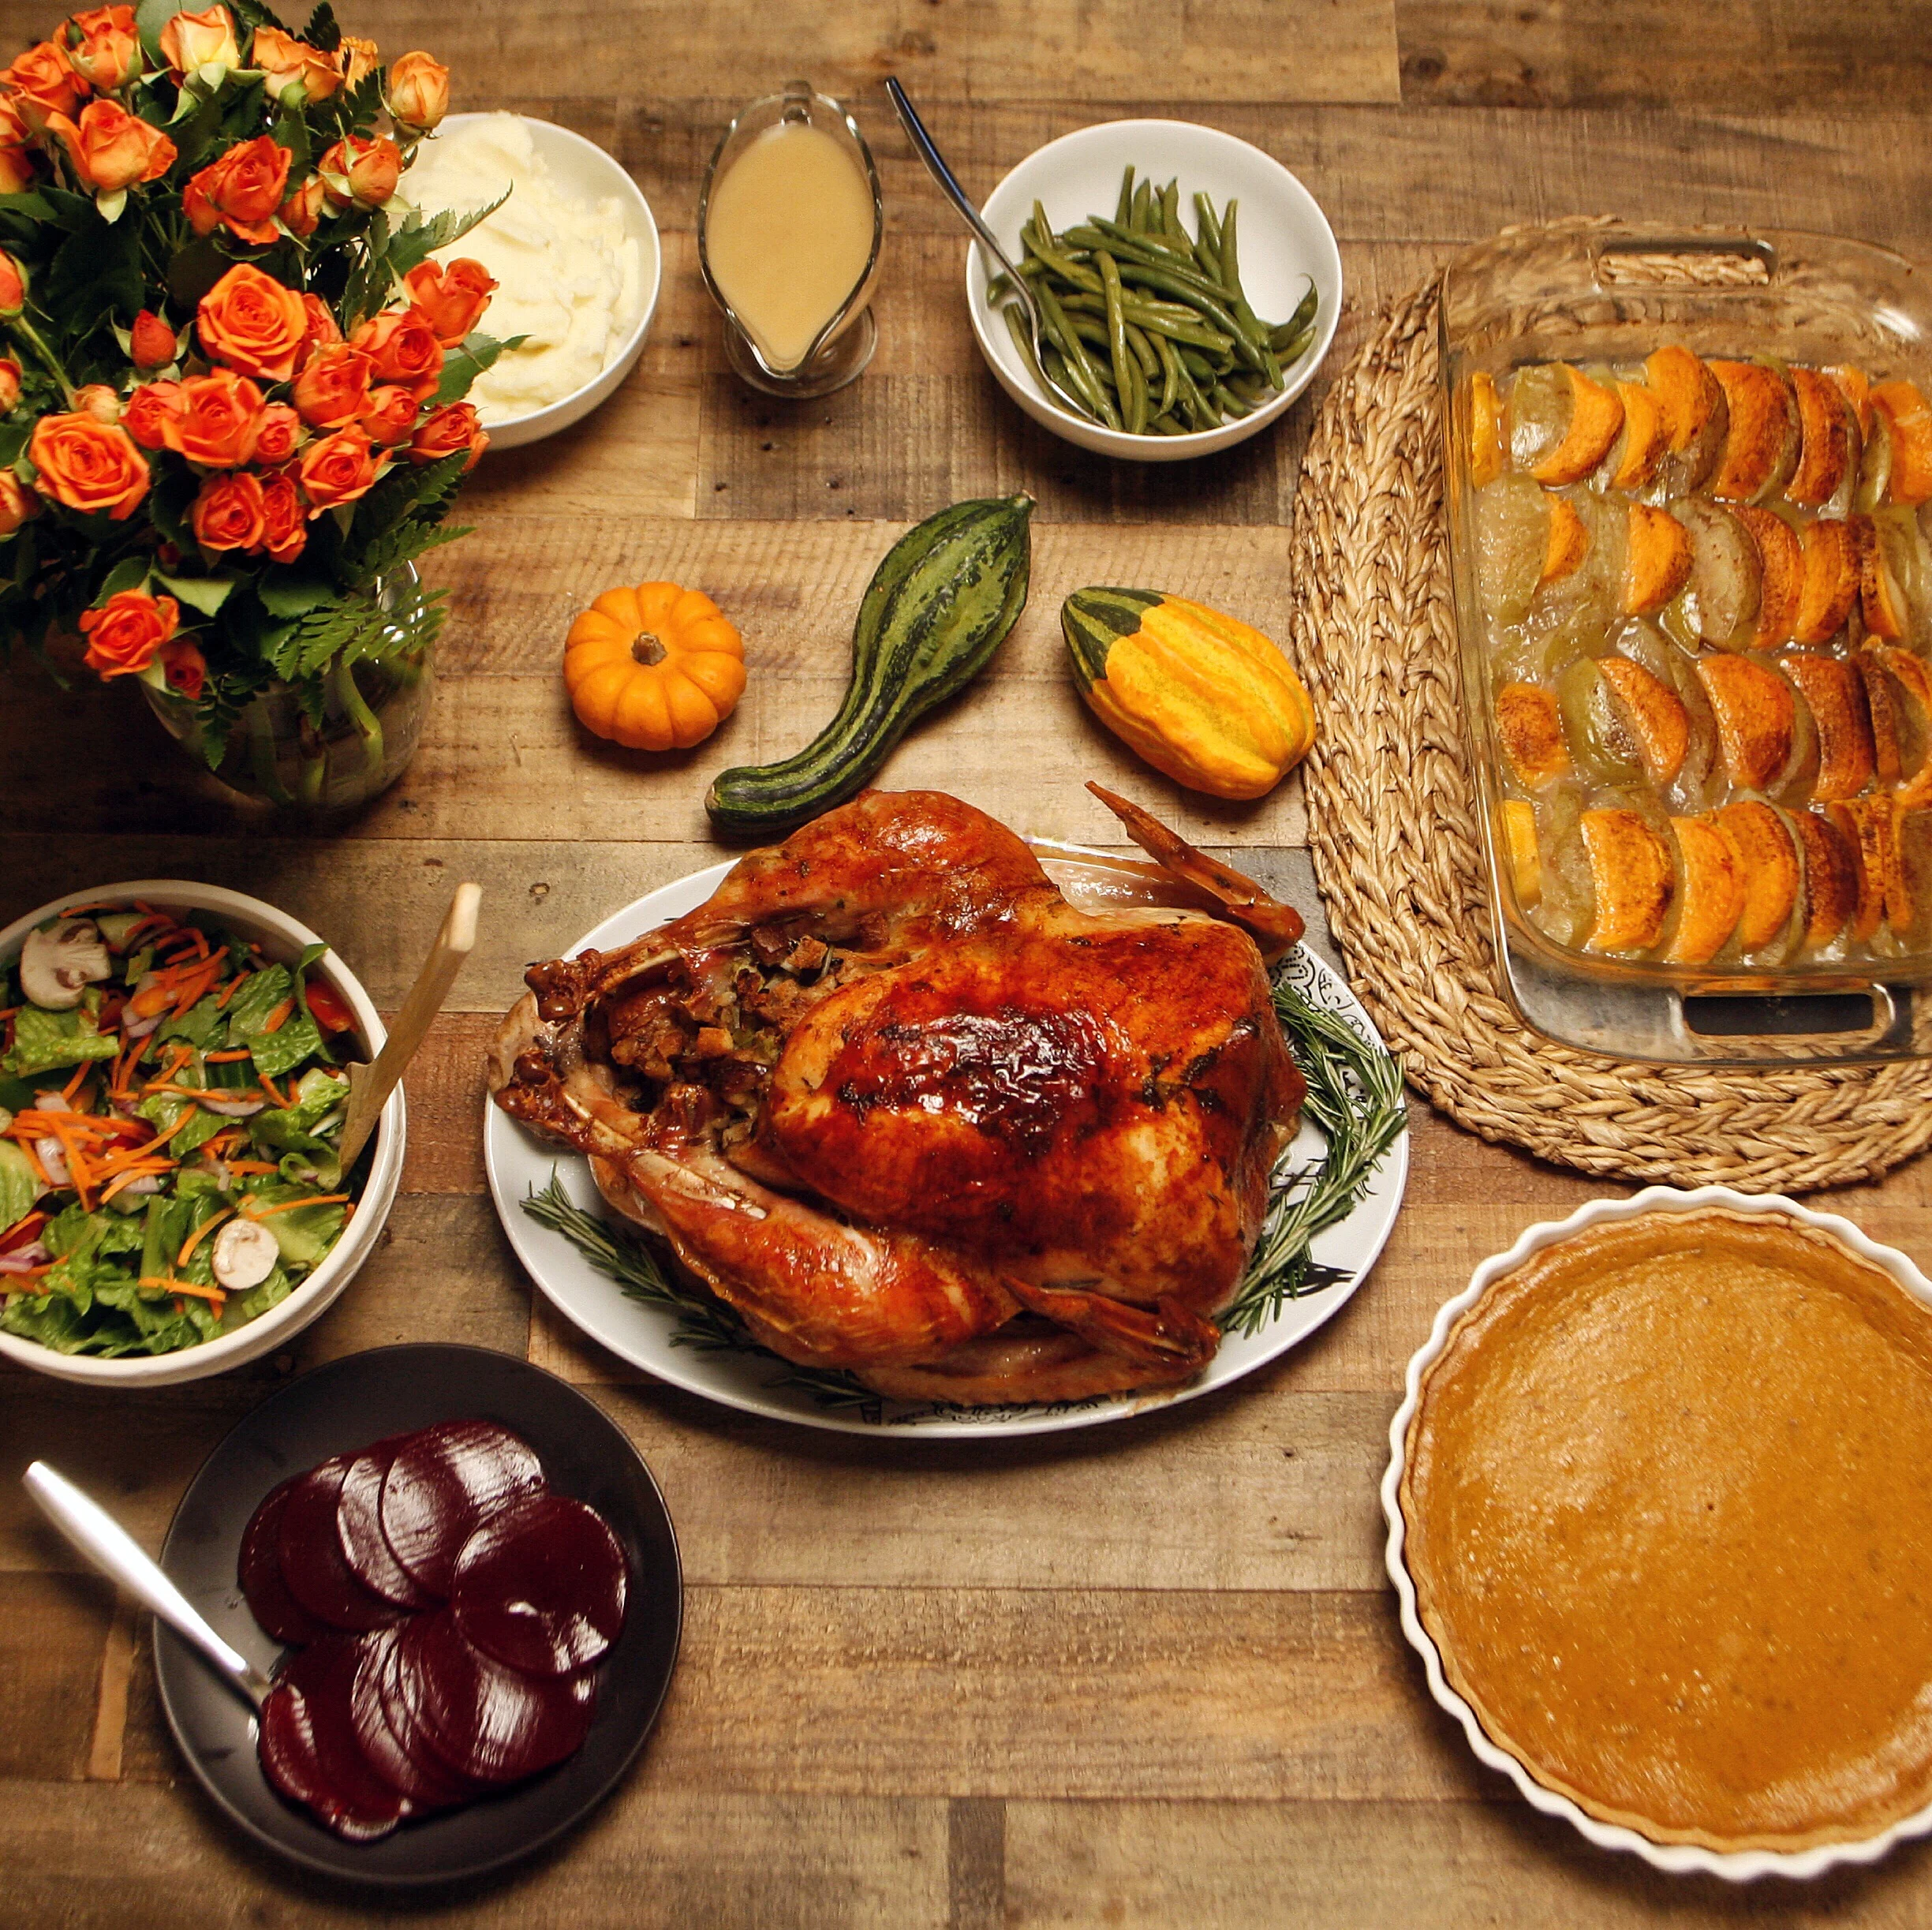
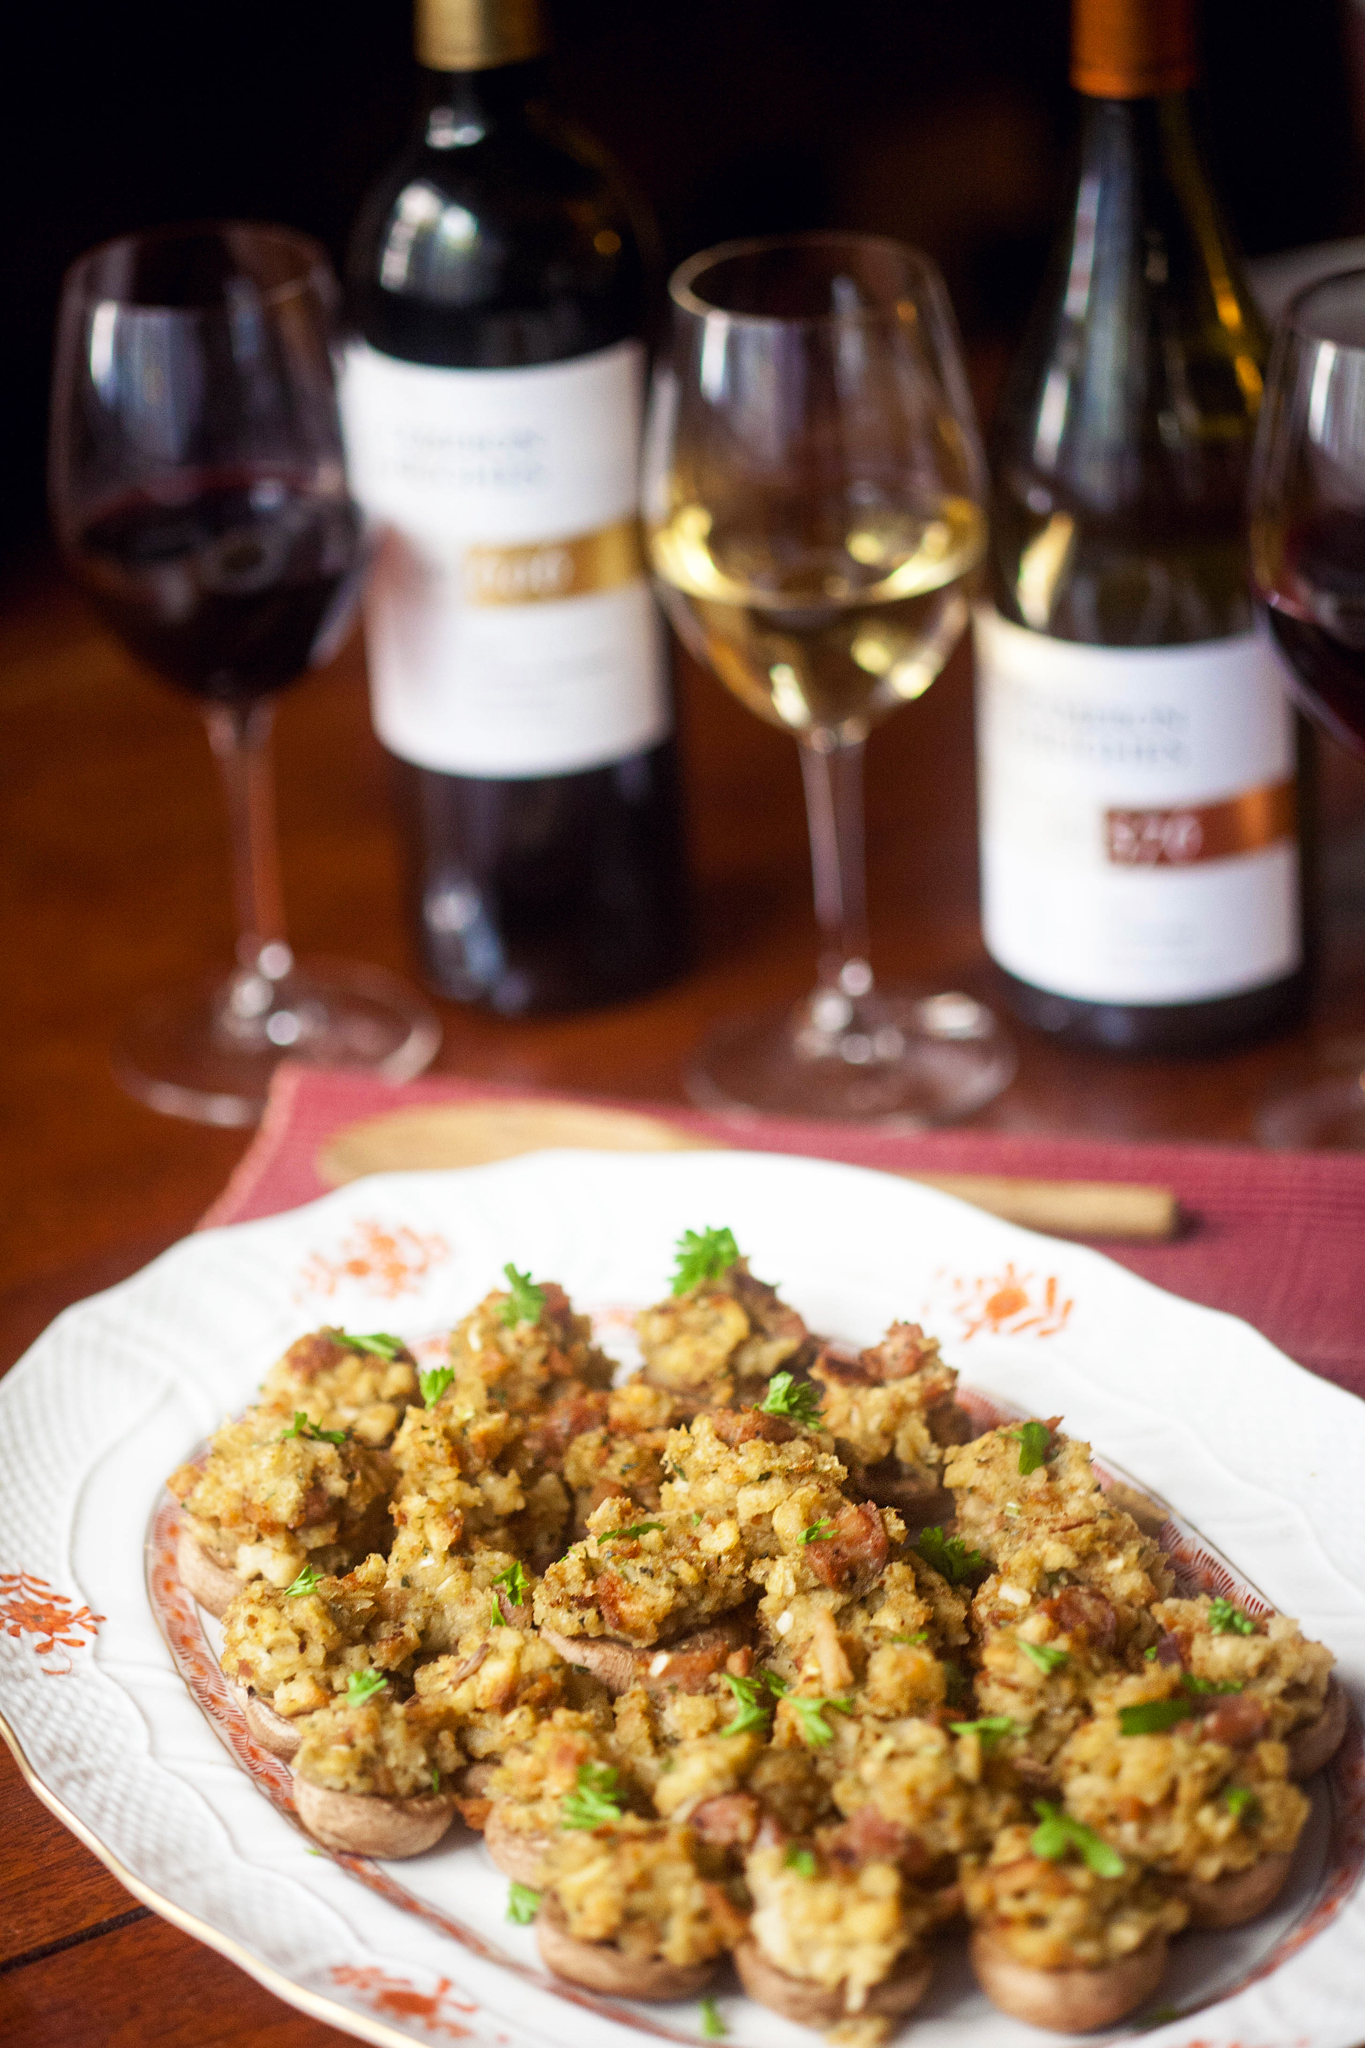
One of my favorite appetizers in the world are stuffed mushrooms. They can be of any kind. But paired with another fav, the glorious Thanksgiving side dish I go crazy for; stuffing, the combination is deliciously lethal. But anything that goes perfectly well with a nice hors-d'oeuvre is a really nice glass of wine. Exceptional wine, extraordinary value. Great wine doesn't have to be expensive and Cameron Hughes wine's mission is simple: Buy the best possible wine for the best possible price. Which is why I'm so happy to partner with this San Francisco-based wine company founded by Cameron Hughes! In today's post, I'm sharing my thoughts on three different bottles of wine from this brand including my very own quick and easy stuffed mushroom recipe.

The stuffed mushroom recipe literally consists of only 3 items, minus the butter and boiling water. Aside from that, all you need are white mushrooms, sweet Italian sausage (or any sausage you'd like to try it with), and Stove Top's 'Savory Herbs' stuffing. I do know how to make homemade stuffing, which I do almost every Thanksgiving, but it does require more time and it does always taste better cooked in the bird. All that flavor you're missing out on! But sometimes, for something simple and painless this recipe takes less than an hour to prepare + make on top of going well with either a red or white wine. 

photos + recipe by © Suzanne Spiegoski

photos + recipe by © Suzanne Spiegoski

Stuffed Mushrooms

Ingredients:

24 oz fresh whole white mushrooms (about 28)

1/2 lb bulk spicy Italian sausage, cooked and drained

1 box Stove Top 'Savory Herbs' stuffing

Directions:

Heat oven to 375°F. Remove stems from mushroom caps; discard stems.

On an ungreased 15x10-inch pan with sides, place mushrooms, stem-side down. Bake 10 to 12 minutes or until they just start to release their juices. Remove mushrooms from pan; drain. Remove any liquid from pan.

In a medium bowl, mix Stove Top (cooked) and sausage until well blended. Divide and spoon filling into mushroom caps, mounding slightly. Place mushrooms in the same 15x10-inch pan.

Bake 13 to 18 minutes or until golden brown on top and heated through.

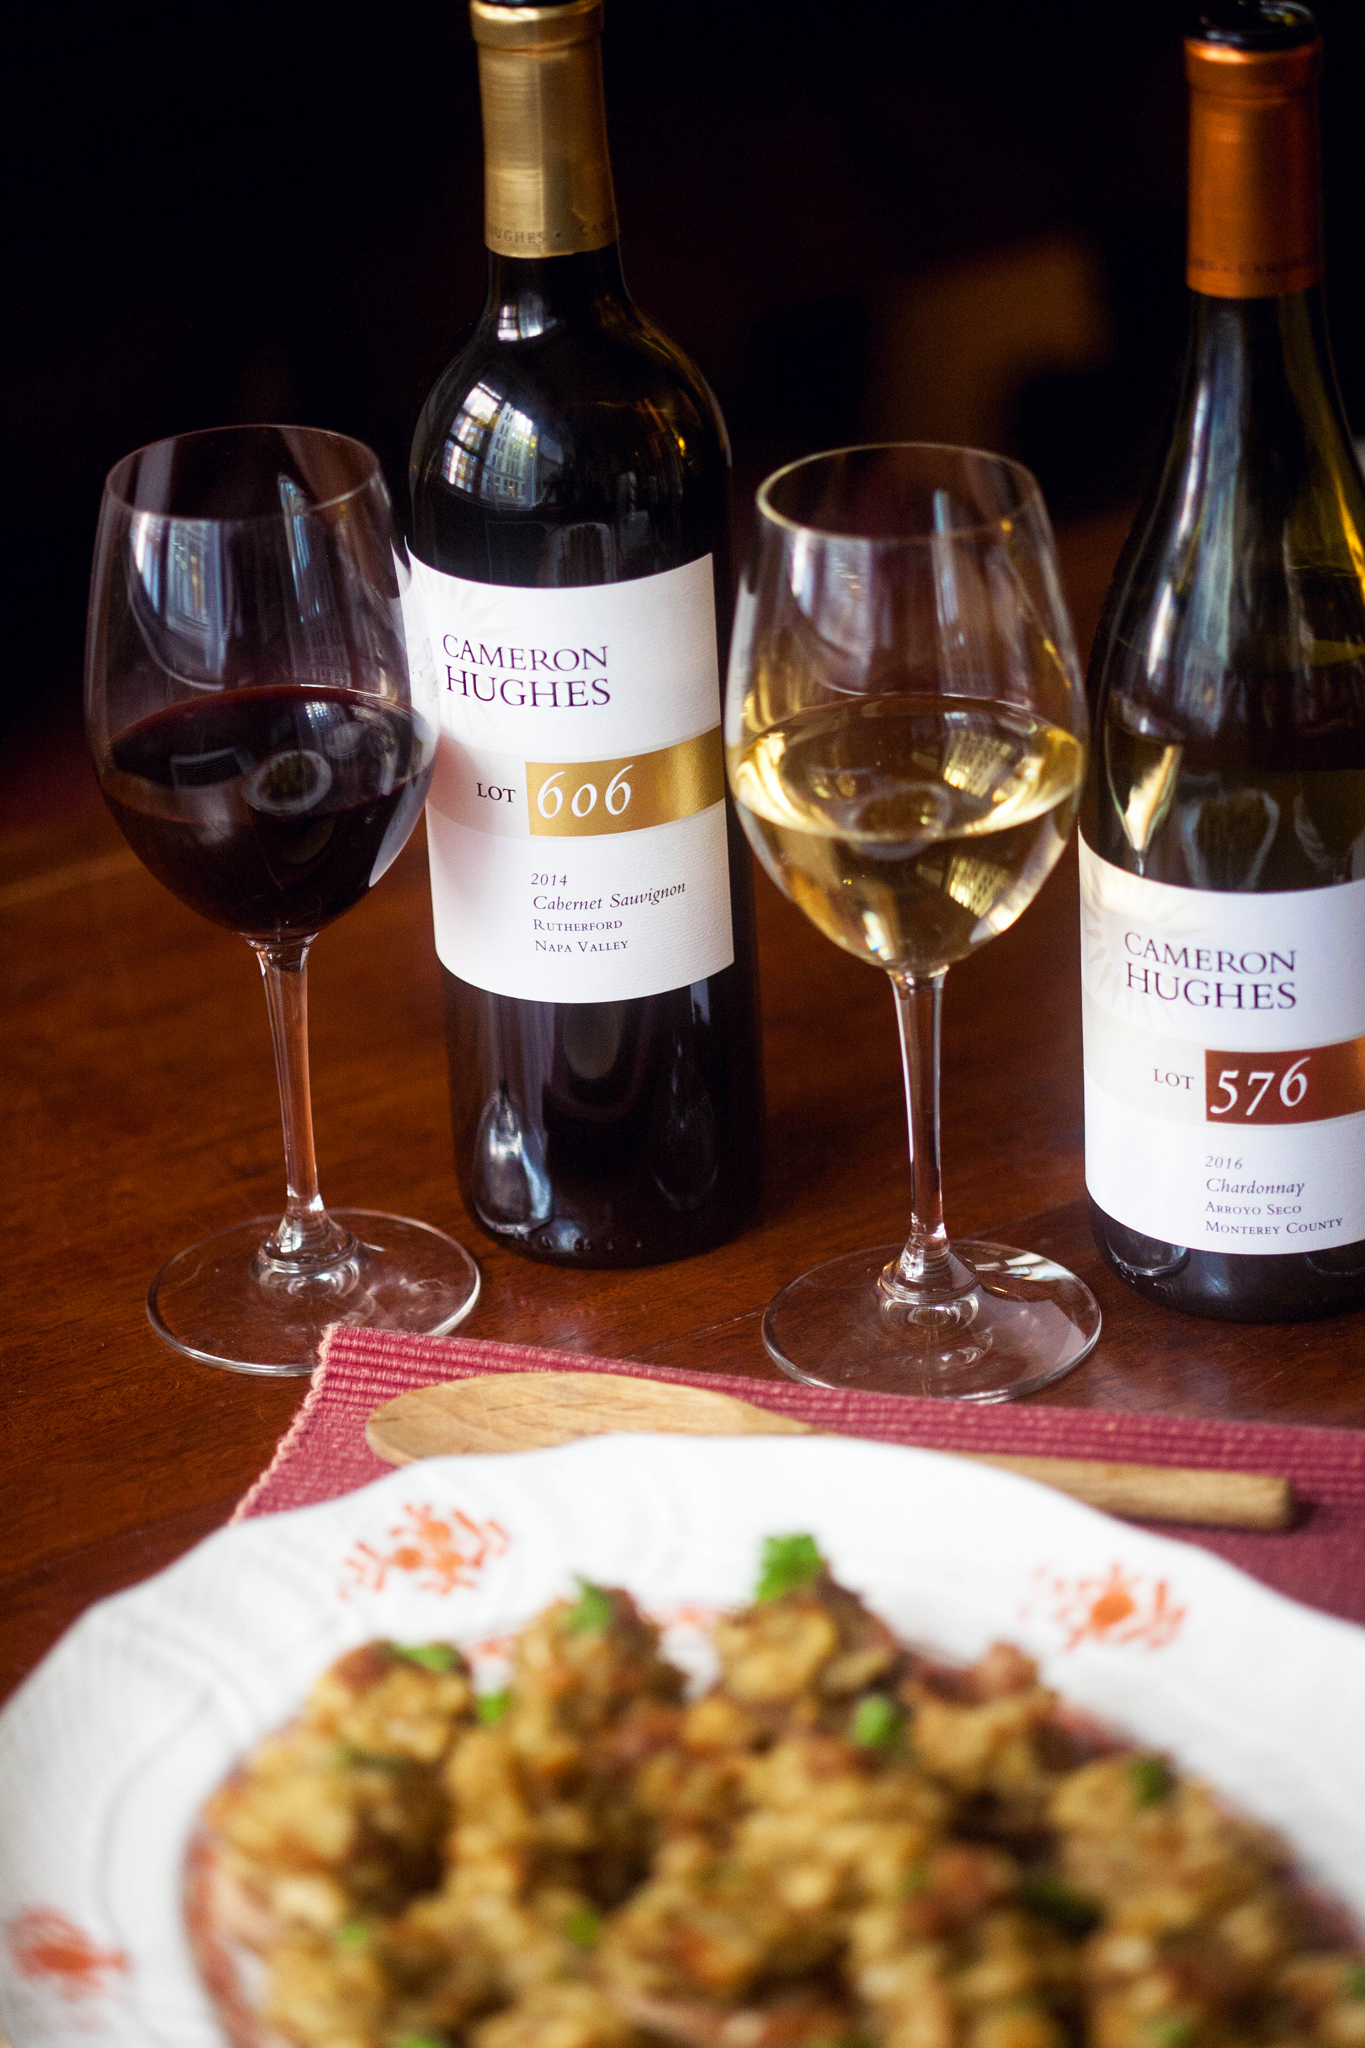
My friends and I first tried the Chardonnay. The super fresh nose of honeysuckle, pear, and apple gains weight and complexity with a bit of air, adding papaya and orange creamsicle to the mix. Creamy and supple on entry, this wine really hits the “umami” button, with rich orange sherbet and vanilla notes riding that honeyed beam of acidity I find so thrilling about the Chardonnays from this region. Robust yet wonderfully complex even at this young age, it finishes in long waves of ripe fruit and creamy vanilla. Yum.

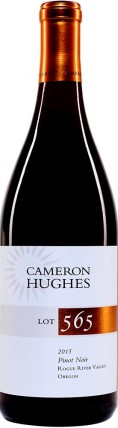
Next up is the beautifully balanced, complex Pinot Noir that will have broad appeal, providing ample punch but also carefully delineated flavors. Pale ruby in the glass, this Pinot starts with rose petal and earthy black cherry on the nose, opening up to reveal the warmer plum and brown baking spice notes with hints of pepper. Ample yet very refined on the palate, with perfect balance and emerging complexity that will definitely improve in the short term as this opens up in the bottle over the next month or two before settling in for long-term aging. Rich and concentrated on the palate with pretty yet ripe plum mingling peppery spice notes, this wine has plush texture and balance in a long, smooth, harmonious finish.

And lastly, no expense spared, icon-level winemaking. Aged in 50% new French oak, this opaque black wine is textbook, classic Rutherford Cabernet. Sumptuous and suave on the nose, it features a gorgeous mélange of blackberry, cherry, cassis, dark chocolate and mint underpinned with graphite and mineral wrapped in lavender florals. The palate is juicy and succulent, with red and black fruit and a finely knit but resounding kirsch/mocha punch. I have to say out of the three, the reds were my favorite, especially the Pinot Noir. What kind of wine do you normally drink with an appetizer? 

I was selected for this opportunity as a member of CLEVER and the content and opinions expressed here are all my own.

LOVE & XX'S,

maqandsuz_logo.jpg

SHOP THE WINE

FOLLOW MAQ + SUZ

OTHER SIMILAR POSTS

Kimchi Risotto

A rainy start to the work week, I wanted to create some new food content as a lot of you have been making several requests as of late. Plus, I've been going through a lot personally, and cooking has always been therapeutic, for me, at least. Eating well never sucks and having others enjoy the food I make results in me being happy, which also never sucks :) So let's talk about this wonderful recipe I tried out - it's nutty, buttery, and tangy with just the right amount of heat, and perfect for a chillier day like today... kimchi risotto! What the heck did I just say?!

Kimchi Risotto

photos by © Suzanne Spiegoski

photos by © Suzanne Spiegoski

Serves 2

Ingredients:

1/2c Kimchi juice (squeezed from kimchi)

1/2 Kimchi (minced)

3c Vegetable stock

2Tbsp butter

2 Cloves garlic (minced)

1c Sushi rice

3-4Tbsp Gruyére cheese (grated with a microplane)

Directions:

  1. Squeeze the juice out of the kimchi using your hands to make 1/2 cup of juice and then weigh out 100 grams of squeezed kimchi. Mince the kimchi.

  2. Pour the vegetable stock into a pot and bring to a simmer over high heat. Turn down to low to keep warm.

  3. In another pot, add the lard and garlic and saute until fragrant.

  4. Add the minced kimchi and continue sauteing until the kimchi is translucent.

  5. Add the rice and stir until the rice has evenly absorbed all the oil.

  6. Add the kimchi juice along with a ladleful of hot vegetable stock and stir the rice until most of the water has been absorbed.

  7. Continue adding vegetable stock a ladleful at a time and stirring until the rice is your desired consistency. You may not need all the stock.

  8. When the rice is done, add the grated Gruyère and stir into the risotto. Serve immediately.

I know, initially the idea sounded a bit peculiar. Swiss cheese with kimchi and sushi rice? But the combination of flavors go wonderfully within this dish, and though I've made risottos in the past, I've never tried a fusion recipe of this kind before. And the results were sublime, I'll tell you! One of my favorite dishes is risotto, which would make sense given I'm such a rice girl. But the creamy warm flavors delight my taste buds, as I'm sure they do yours. I love a mean, mushroom risotto, but this kimchi risotto certainly takes the cake! The flavors are really all there, you don't even need to add salt! 

I normally use arborio or baldo rice when it comes to making risotto, but I found sushi rice to be an interesting type of rice to use in this fusion recipe. Though this recipe is derived from here, I did a bit of my own tweaking in terms of measurements and the different use in rice. You could also try using a different form of kimchi, such as turnip/radish, which would still bring the acidity into the risotto. I'd love to give a zucchini kimchi a go, what do you guys think about the sounds of that? 

Here are a few tips to achieving the ultimate risotto: Number one - the broth you use to mix the risotto should be very heat, it better cooks down the rice giving it that smooth, creamy goodness that should be when making risotto. Number two - you can use lard instead of butter should you want a more rich flavor but I like to eat pretty healthy (not that butter is any healthier lol), should you not want to use butter at all, you can try making it with coconut oil! And lastly, when it comes to making your own risotto, try to live a little on the wild side. Mix up the flavors, try something you haven't tried before. Get creative. After all, that's part of the fun when it comes to cooking, am I right or am I right? :) 

LOVE & XX'S,

FOLLOW MAQ + SUZ

OTHER SIMILAR POSTS

Korean Coq Au Vin

Happy Friday and Happy St. Patrick's Day, everyone! Kiss me, I'm Korean (and Polish)! ;)

In light of the 'blizzard' this week here in NYC, we got lucky. Expecting over 2 feet turned over to only about a foot and the conditions were mostly icy with frigid temps! I bet a lot of you are looking forward to spring just as much as I am! With a snow day on our hands midweek (seriously everything was closed, from schools to banks... even Starbucks!), I cooked up more of a fall/winter dish that I've been dying to make. A well known French dish, I also wanted to put a twist on it and created a Korean Coq au vin.  

Korean Coq Au Vin

Serves 2-4

photos + recipe by Suzanne Spiegoski

photos + recipe by Suzanne Spiegoski

Ingredients:

24 to 30 pearl onions
4 chicken thighs and legs, or 1 (5 to 7-pound) stewing chicken
¼ to ½ c AP flour
2 Tbsp water
6 ounces bacon, chopped
8 ounces button mushrooms, sliced
1 Tbsp butter
2 bottles red wine, preferably pinot noir or cabernet
2 Tbsp Gochujang
2 Tbsp tomato paste
1 medium onion, chopped
2 stalks celery, quartered
2 medium carrots, quartered
3 cloves garlic, crushed
6 to 8 sprigs fresh thyme
1 bay leaf
2 cups chicken stock

Directions:

Preheat oven to 245 degrees F.

Cut off the root end of each pearl onion and make an "x" with your knife in its place. Bring a pot of water to a boil and drop in the onions for 1 minute. Remove the onions. Allow them to cool, and then peel. You should be able to slide the onions right out of their skin. Set aside.

Sprinkle the chicken on all sides with salt and freshly ground black pepper. Place the chicken pieces, a few at a time, into a large sealable plastic bag along with the flour. Shake to coat all of the pieces of the chicken. Remove the chicken from the bag to a metal rack.

Add the 2 tablespoons of water to a large, 12-inch sauté pan over medium heat along with the bacon. Cover and cook until the water is gone, and then continue to cook until the bacon are golden brown and crispy, approximately 8 to 10 minutes. Remove the salt pork from the pan and set aside.

In the same pan, using the remaining fat, add the pearl onions, sprinkle with salt and pepper, and sauté until lightly brown, approximately 8 to 10 minutes. Remove the onions from the pan and set aside. Next, brown the chicken pieces on each side until golden brown, working in batches if necessary to not overcrowd the pan. Transfer the chicken into a 7 to 8-quart enameled cast iron Dutch oven.

Add the mushrooms to the same 12-inch sauté pan, adding the 1-tablespoon of butter if needed, and sauté until they give up their liquid, approximately 5 minutes. Remove and set aside.

Pour off any remaining fat and deglaze the pan with approximately 1 cup of the wine. Pour this into the Dutch oven along with the chicken stock, tomato paste, gochujang, quartered onion, carrots, celery, garlic, thyme, and bay leaf. Add all of the remaining wine.

Place the chicken in the oven and cook for 2 to 2 1/2 hours, or until the chicken is tender. Maintain a very gentle simmer and stir occasionally.

Once the chicken is done, remove it to a heatproof container, cover, and place it in the oven to keep warm. Strain the sauce in a colander and remove the carrots, onion, celery, thyme, garlic, and bay leaf. Return the sauce to the pot, place over medium heat, and reduce by 1/3. Depending on how much liquid you actually began with, this should take 20 to 45 minutes.

Once the sauce has thickened, add the pearl onions, mushrooms, and bacon and cook for another 15 minutes or until the heated through. Taste and adjust seasoning if necessary, remove from the heat, add the chicken and serve.

*Tips: If you want to do it overnight, just do everything up to putting the chicken in the oven. That part is for the next day :) The longer you marinate, the better the flavor! xo

Coq au vin is a French dish of chicken braised with wine, lardons, mushrooms, and optionally garlic. What are we talkin' bout here, optional?! I LOVE garlic so hell YES you best put those bad boys in with the rest of the ingredients! So what's the Korean twist? Kimchi? Nope. I used a spicy red pepper paste called gochujang. It's a staple paste in Korean cuisine and I thought the already-complex flavors would be killer-good in this dish. And with old school mashed potatoes? Oh YAY. 

What's the secret to the most delicious mashed potatoes of your life? Butter, milk, and salt. That's it. I make sure to really boil the bejeezus out of the potatoes and make sure they're Idaho! I feel like this is the starchiest potatoes and are perfect for mashing. I know I'm sure I've mentioned it before but you guys have no idea how much I LOVE mashed potatoes. I always tell people if I were deserted on an island and only had one choice of food to live off on, it'd be just that. And I'd die a happy woman. HA HA HA! BUTTTTTTT, (enter sad face) I've discovered after experimenting for a few months, that the more dairy products I consume, the more my skin breakouts! Also, did you know that eating more dairy also dries your scalp, leading to dandruff and other skin issues? A good substitute is chicken or vegetable broth, if you want to opt out on the milk in the potatoes.  

Stay tuned for a new post coming up on the blog featuring an amazing NYC-based ethical luxury handbag brand that I had the pleasure of working with! Can't wait to share with you guys our photo shoot! It snowed that day and we had lots of fun taking photos in the Financial District of Manhattan. Soon to come, have a great Friday, friends! For more recipes, check them down below. :)

LOVE & XX'S,

SHOP THE PRODUCT

FOLLOW MAQ + SUZ

OTHER SIMILAR POSTS

Matcha Popcorn with White Chocolate and Black Sesame Seeds

Happy October! My favorite month always starts off with a bang. Come the 1st day of October every year is my beautiful boy, MaQ's birthday! He is four years old today and officially a grown-up. He's still young at heart, but his demeanor is more calm nowadays. More gentleman-y. The hubby and I had plans for his birthday but unfortunately the New York weather is being extremely uncooperative, and will be raining for the next couple of days. All. Day. Long.  

photos + recipe by: © Suzanne Spiegoski 

photos + recipe by: © Suzanne Spiegoski 

Matcha Popcorn with White Chocolate and Black Sesame Seeds

Ingredients:

4 ounces white chocolate chips

1/2 teaspoon Japanese matcha green tea

1/2 cup popcorn kernels, popped (about 8 cups popped)

Black sesame seeds

Directions:

  1. Place white chocolate chips in microwave-safe bowl and microwave at 15-second intervals, stirring between each one, until melted.

  2. Add matcha powder and stir until completely incorporated. Hello, green!

  3. Place the popcorn in a large bowl and drizzle with the white chocolate mixture, tossing as you go, until popcorn is evenly coated. Season with salt. Set popcorn in refrigerator until white-chocolate coating has firmed, about 10 minutes. Break up any clump and serve. Popcorn can be stored in the refrigerator overnight using Ziplock bag.

So you know what rainy days call for. Cooking times with Suz! :) Aside from MaQ's birthday being one of the reasons why I love October so much, I also am a big fan of Halloween. I decided to make 'Frankenstein' popcorn! This is matcha green tea incorporated into melted white chocolate and the best part, with the popcorn. Mmmmm... let's not forget the wonderful black sesame seeds. Its deep, rich flavor complements with the mild sweetness from the white chocolate, overall giving this dessert a well-balanced combination in taste. Tell me a kid who wouldn't want to try this popcorn - just look at that green color!  

Instead of venturing out in the rain for MaQ's birthday this weekend, we've postponed our plans and we'll be keeping it low key and just trying to recuperate from the crazy busy month we've had. The key is to try. ;) Everyone needs to recharge their batteries every now and then. I want to check out 'The People v. O.J. Simpson' TV show, munch on some 'Frankenstein' popcorn, nap, and munch down on more deliciousness I'll be cooking later. Chicken Jardinière anyone? Perfect for gloomy, dreary days like today.

Hope you have a nice weekend. Coming up Monday on the blog, I'll be sharing another outfit post featuring my most recent pieces of jewelry and a twist on the latest reverse/backwards shirt trend, where you any shirt that buttons down in the front; you switch it to the back. Playing a lot with masculine and feminine tones together lately. Stay tuned...

LOVE & XX'S,

FOLLOW MAQ + SUZ

OTHER SIMILAR POSTS

Peach Melba

Cheers, it's almost the weekend and I'm about to have me some fun! I finally found my edible flowers, y'all! After patiently waiting until Wednesday, I happily went to the Union Square Farmer's Market and picked up some vibrant babies with Windfall Farms. They have the freshest flowers to work with and ever since they've caught my eye during the start to spring, I've been dying to add them in my practice with plating. Plus, edible flowers can really bring a dish together with its fragrant and earthy qualities. Not to mention how aesthetically sound they are, especially with desserts. 

recipe + photos by © Suzanne Spiegoski

recipe + photos by © Suzanne Spiegoski

Peach Melba


Ingredients:

Peaches:
1 1/2c water
1 3/4c sugar
1 vanilla pod, split lengthwise
1Tbsp lemon juice
2-3 peaches

Raspberry sauce:
1 1/2c raspberries
1/4c confectioners' sugar
1 teaspoon lemon juice

1 pint of vanilla bean ice cream
Raspberries & peanut granola to garnish.

Directions:

Put the water, sugar, lemon juice, and vanilla pod into a wide saucepan and gently heat to dissolve the sugar. Bring saucepan to a boil and let it bubble for 5 minutes. Turn heat down to a fast simmer.

Cut the peaches in half, and if the stones come out easily then remove them. If not, you can get them out after poaching them. To poach, put peach halves in the sugar syrup for about 2 to 3 minutes on each side depending on the ripeness of the fruit. Test the cut side with the sharp point of a knife to see if they are soft. Remove with slotted spoon.

Peel skin off peach halves and let them cool. Be sure to remove stone after. To make raspberry sauce, blend fresh raspberries, confectioners' sugar and lemon juice. Sieve to remove the pits and pour the puree into a jar.

To serve, allow 1 -2 peach halves per person alongside with a scoop of vanilla bean ice cream. Spoon raspberry sauce over each.

One of my all-time favorite desserts (originally from France) is the peach melba. The combination with the sweet peach and tartness from the raspberries is a symphony in your mouth. Add in the vanilla ice cream and its oozy, creamy combo will definitely have you feeling some type of way! Instead of doing it the traditional way, like how I used to get it at the retirement home I worked at as a teenager (yup, true story), was a scoop of ice cream, half of a poached peach, and with some drizzling of raspberry sauce. Nothing fancy. And it doesn't need to be. But I have such a passion when it comes to cooking, I'm always trying to elevate dishes to the next level. I even formed my first ice cream quenelle! So here you have it: My deconstructed version of the peach melba dessert. You can download the recipe by clicking on the button above. Got questions or comments? I love hearing from my readers! Write your thoughts down below. I've got some really exciting content coming up for the rest of the summer! And yes, it will include some traveling! Yay! Plus I'll be celebrating my one year anniversary since creating MaQ + Suz, and of course I'll be doing a post on this! Stay tuned...  

LOVE & XX'S,

FOLLOW MAQ + SUZ

OTHER SIMILAR POSTS