Roasted Pumpkin Seeds

This week I wanted to cook something Korean again but I had all these pumpkin seeds from the other day making that 'MaQ-o'-lantern'. And just like my father, I LOVE roasted pumpkin seeds! They are quite the tasty snack and I couldn't just let these nutritious lil' gems go to waste! I usually just season them with a little salt, but I saw a really awesome video by Tasty on Facebook showcasing a variety of seasonings! They're all great, ranging from wasabit to sriracha honey, but I went with the pumpkin pie and cocoa seasonings for today.

Directions

Roast pumpkin seeds in an oven at 350F until dry but not golden.

All amounts for 1 cup of seeds.

Seasoning Ingredients (Two-ways)

PUMPKIN PIE: 2 tsp cinnamon, 2 tsp ginger, 2 tsp allspice, 1 tbsp sugar
COCOA: 1 TBSP unsweetened cocoa powder, 2 tsp sugar, 1/2 tsp cayenne

Coat pumpkin seeds in a few TBSP of vegetable oil and then mix in seasoning.

Roast at 350F until golden.

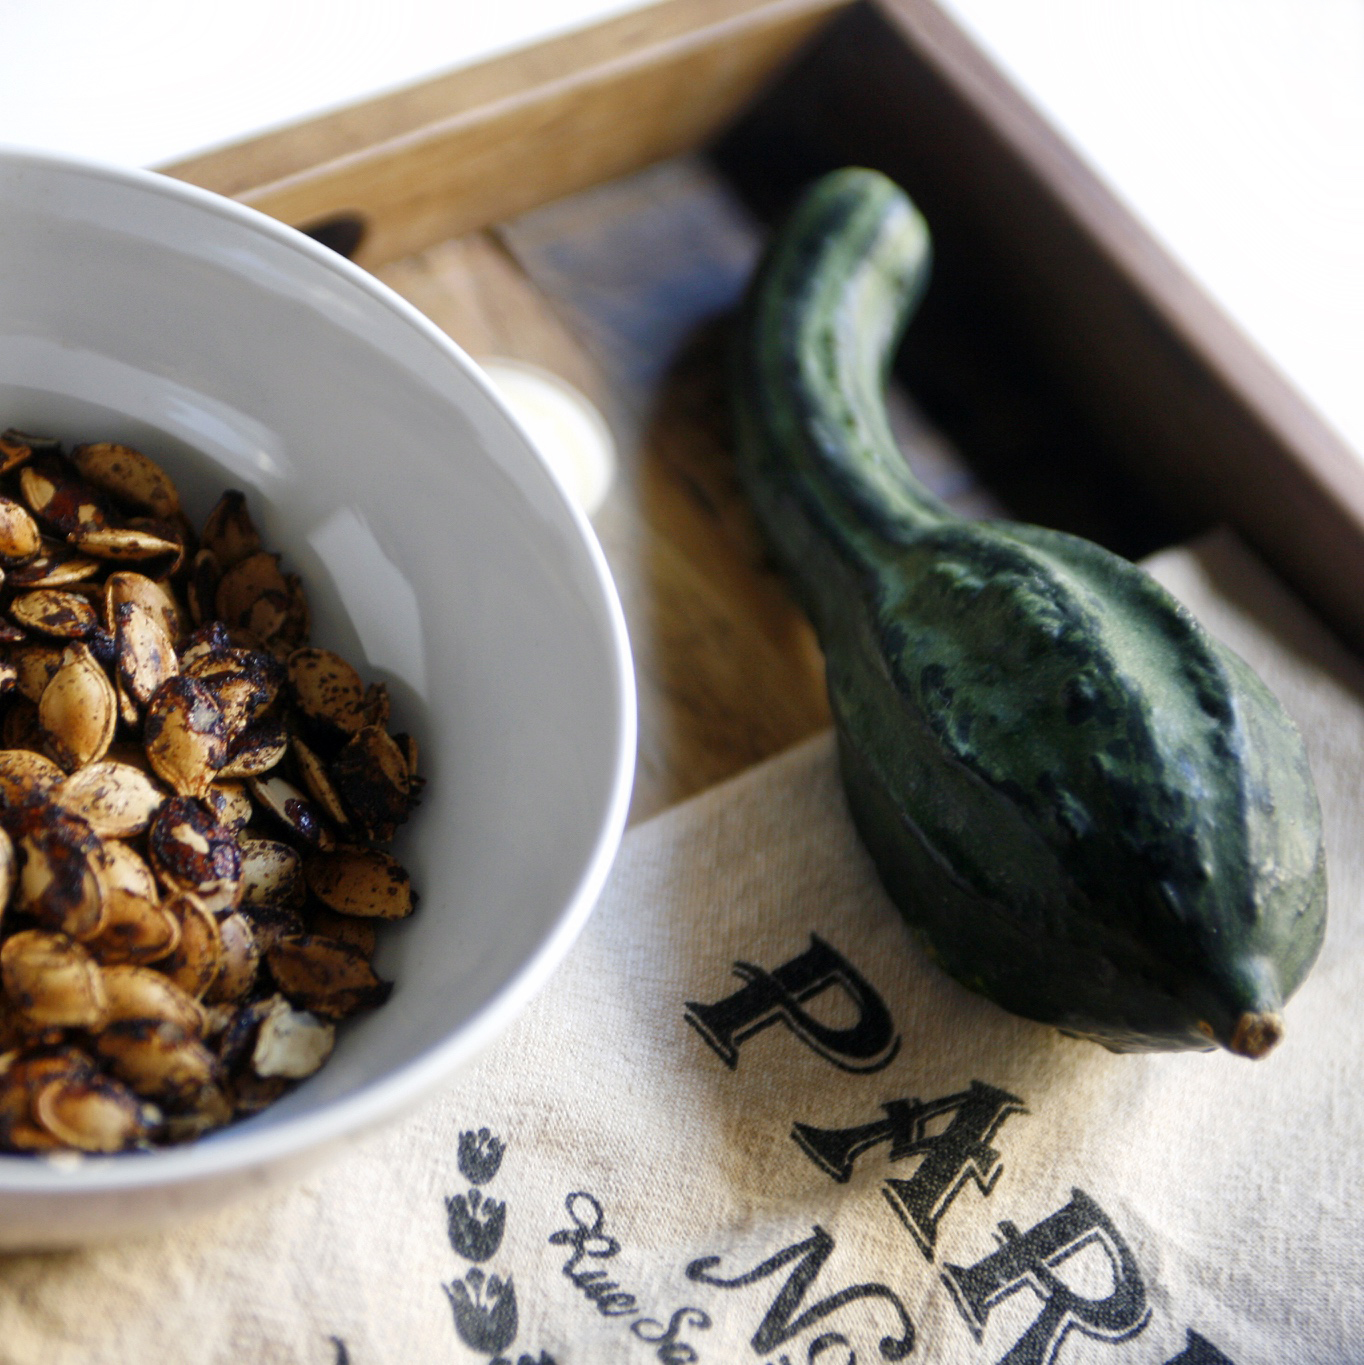
I loved the cocoa pumpkin seeds! Really super delicious! They're not too sweet and the cocoa unearths the pungent taste in the seeds, making it such a pleasant surprise in your mouth. ;)

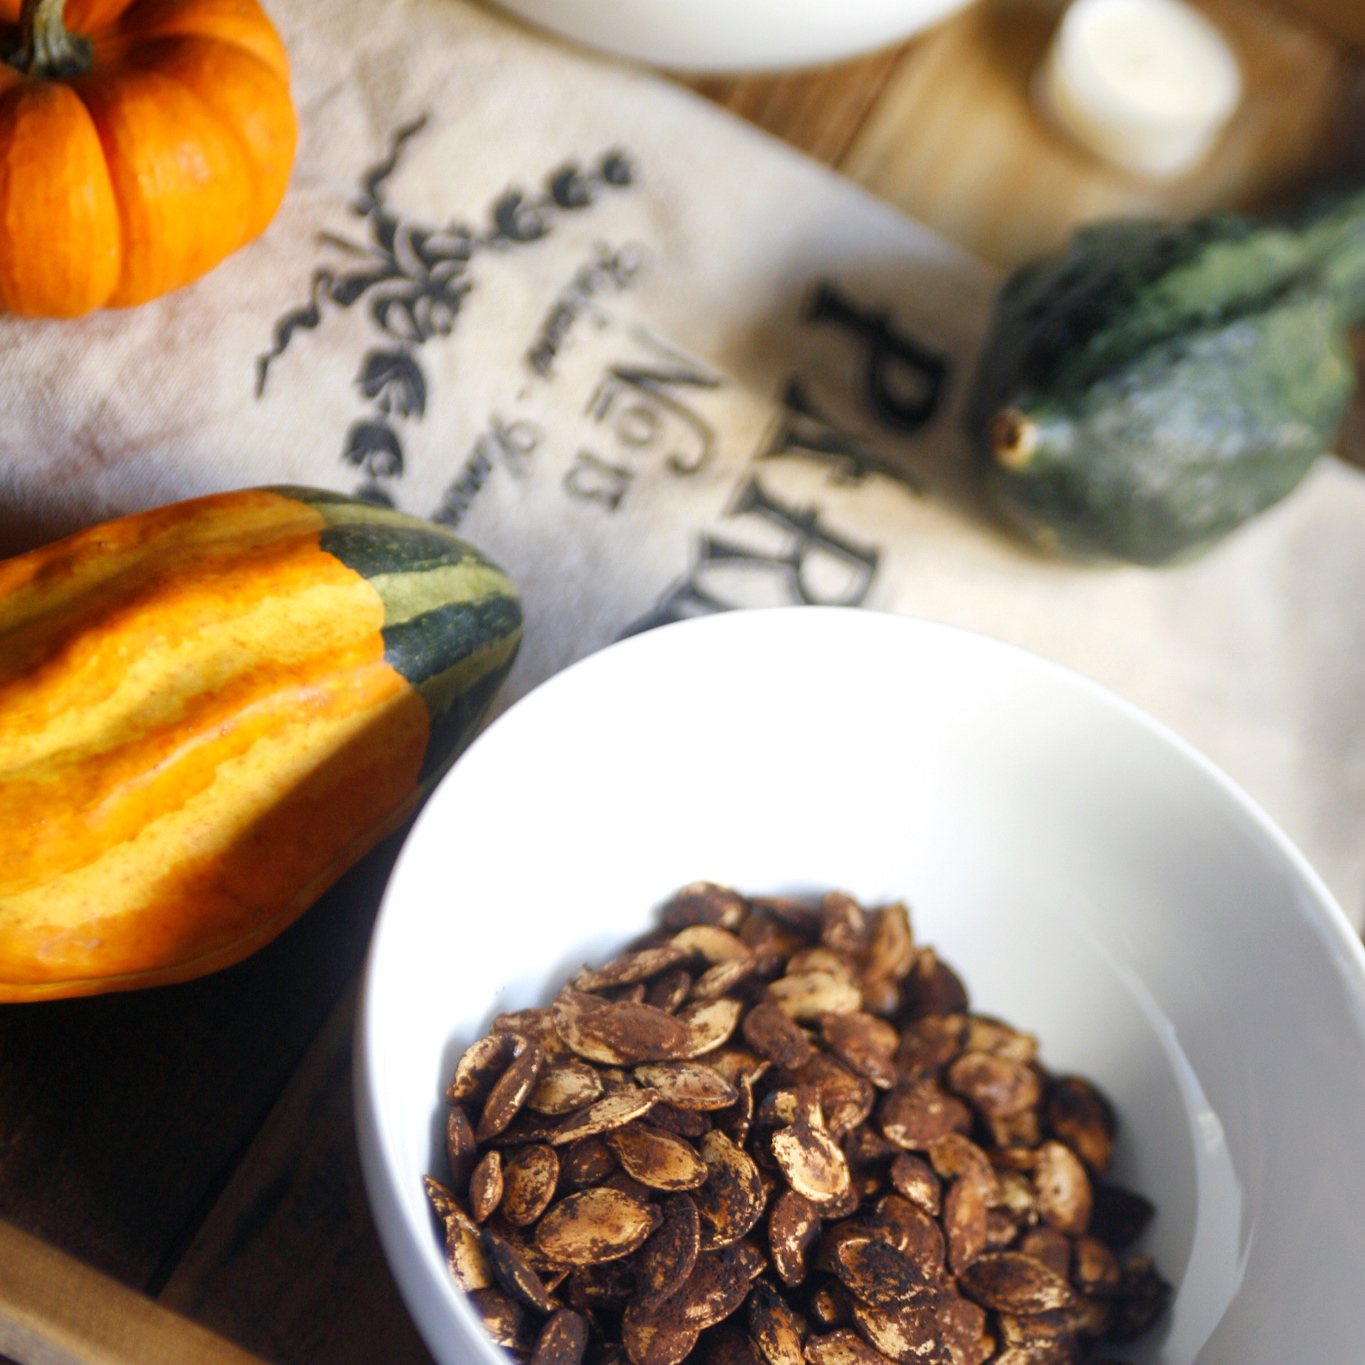
The pumpkin pie is also not very sweet and is absolutely scrumptious. That's what I like about pumpkin seeds, that they're not only healthy but they are a treat that's not loaded with some God-awful ingredient like high fructose corn syrup or anything that has so much sugar, my heart rate spikes just looking at the numbers! The cinnamon and all spice, along with the ginger and 1 tbsp of sugar is a terrific Fall mix, my hubby tried them for the very first time (he's French, they don't exactly roast pumpkin seeds everyday) and loved them!

They are such a staple Fall snack for me. I'm so happy to have tried different, authentic flavors! It just gets me really pumped up for next month, my favorite time of year with all those incredible Thanksgiving dishes, where I try to create a new dish every year. Can't wait to share with you with what's to come!

I'm really excited to munch down on these later, normally I'll make a bag of popcorn or have some kind of chips and dip, but this is a great substitute and is very good for you! Are you a fan of pumpkin seeds? What's your favorite seasoning for yours? Leave a comment in the box!

Have a fantastic & cozy weekend!

Love & xx's,

maQ + suz

Kimchi Deviled Eggs

Um, I just need to forewarn you that these are highly addictive! And they are super quick and easy to make, which is always a plus in anyone's kitchen! If you're as much of a fan as I am with classic deviled eggs, these are even better with a twist! We got some Korean ingredients in there! That's right, kimchi city here we come! ;)

At first I found the combination of ingredients to be somewhat ghastly! Mayo and mustard with kimchi?! Eeeeek! But after creating these deviled eggs, I found them to be scrumptiously delicious! This is perfect for a brunch, a cocktail party, or just getting together for a casual night in with some friends. It packs a serious punch in your mouth, definitely a Korean party going on in there. Ha ha! Seriously, where's the soju?

Print Recipe

Kimchi Deviled Eggs

Makes 14 deviled eggs

Ingredients

7 large eggs

2 generous tablespoons mayonnaise

2 teaspoons yellow mustard

1/4 teaspoon rice vinegar

1 tablespoon gochujang

1 tablespoon sesame oil

1/4 cup kimchi, roughly chopped

Diced chives and black sesame seeds for garnish


Preparation

Boil the eggs in a small pot for approx. 6-7 minutes. Remove eggs from pot and slowly pour out the hot water. Put eggs back in the pot and fill it with cold water, covering the eggs for about a minute or two.

I have a fun trick to help speed up peeling your eggs. Put one egg in a small glass cup and fill it with water. Shake vigorously up and down and NOT from side to side with one hand holding the cup while the other covers the opening. If you shook correctly, your egg should peel like an orange, very easily and in a circular way.

After peeling, cut eggs in half and scoop out the yolk with a small spoon. Place all the yolk in a bowl and mash them. Then add mayo, mustard, vinegar, gochujang, and sesame oil and mix very well. This will be your filling for the eggs.

Put filling in a piping bag with a fitted tip. Press the bag with your hands to push all of it to the end corner. Make sure to press any air out of the top before you start.

Pipe the filling into each half-sliced egg, until there’s a nice mound over the top. If you’re not feeling up for piping, you can as an alternative, scoop the filling out with a small spoon.

Garnish each deviled egg with kimchi, black sesame seeds and chives. Serve immediately.

My only suggestion for this recipe is to NOT to try and substitute the sesame oil with any other kind (olive, vegetable, etc.) The secret with sesame oil is even a tiny dollop can bring so much flavor, and it is a key ingredient to bring all the other components together. I want to do a blog post on some 'Americanized' kimchi sides, sesame oil yet again, being the main ingredient.

I've been on a Korean kick lately! I'd love to keep posting various Korean dishes, infusing other types of cuisines; American, Mexican, Italian, etc. Stay tuned! Next week's food post will be killer good! I can't wait! Now if you'll excuse me, I have some major eating to attend to!

::Foodie lover at ♥::

IMG_4095.JPG

Love & xx's,

maQ + suz

Raspberry White Chocolate Scones

Happy First Day of Fall! In honor of my favorite season, I started the morning off right with one of my favorite pastries. Scones! And the ultimate combo: a raspberry white chocolate match made in heaven! These are literally the best scones I've ever made, all thanks to Rock Recipes!

Print Recipe

RASPBERRY WHITE CHOCOLATE SCONES RECIPE

Hands down the best scones I've ever made! Thanks Rock Recipes!

Prep: 15 mins Cook: 25 mins Total: 40 mins

Ingredients:

    3 cups flour
    ½ cup sugar
    6 tsp baking powder
    ½ tsp salt
    ¾ cup very cold butter, cubed
    6 ounces good quality chopped white chocolate
    2 tbsp lemon juice
    2 tsp vanilla extract
    1 cup milk
    1½ cups frozen raspberries

Instructions

  •     I start these in my food processor because it is so fast but they can be made just as easily in a large bowl by cutting the butter in with a pastry blender or even 2 knifes held between the fingers.
  •     In a food processor, combine the flour, sugar, baking powder and salt.
  •     Pulse in the cold butter until this mixture resembles a coarse meal. It is very important that pea sized pieces of butter remain in this mixture.
  •     Transfer to a large bowl and toss in the white chocolate.
  •     Mix together the lemon juice, vanilla extract ans milk.
  •     Pour this over the surface of the dry mixture. Toss all together gently with a fork only enough to form a dough ball.
  •     When the flour is almost incorporated, add the frozen raspberries.
  •     Frozen berries work best because they are less delicate and easier to incorporate into the scone dough.
  •     It is important that you work this dough as little as possible or the finished scones will be too dense and heavy.
  •     Roll to 1 inch thickness and cut out scones with biscuit cutter or in triangles with a sharp knife and place on parchment lined baking sheet.
  •     If desired you can brush the tops of the scones with an egg wash of 1 egg beaten together with 1 tbsp water.
  •     You can sprinkle the tops with turbinado sugar if desired but this is, of course, optional.
  •     Bake at 375 degrees F for 25 minutes or until light golden brown. Baking time will vary depending on the size of your biscuit cutter.

Drooling yet? I don't know about y'all but for me, butter is mandatory with scones! So yummy!

I can definitely attest to my hubby's full, content belly. I've already had two with coffee!

What is your favorite kind of scone? Got a killer combination? We'd love to hear about it!

maQ went crazy over the aroma in our apartment. It smells like the most divine bakery right now! Don't you love that after baking? :) We hope, whatever you decide to do to enjoy the first day of Autumn, is a happy, delicious one! We plan to get outside after work! Cheers to the best season!

Love & xx's,

maQ + suz

Friday Stir-Fry

Today on the blog, we have a super delicious, healthy meal you can make in less than 30 minutes! And that includes the marinade time! A perfect recipe for a busy Friday, whether it's lunch or dinner, or if you're planning on going out or staying in!

I make this beef stir-fry on a consistent basis, especially during the chillier seasons, and have been using this recipe for years. It is originally from the amazing Gimme Some Oven food blog, though I've adjusted a couple of items such an opting out on shiitake mushrooms and what to serve it with. You can have any type of rice, quinoa or even noodles with this dish, but being part Korean, Korean sticky rice is what I call for. It's the only rice I use in Asian cuisine. 

This is such a quick and easy recipe. I know some of you may not be a fan of kale, but don't knock it till you try it! It goes perfect with the ginger beef and none of the flavors are overpowering. They are all there and so-so good! Check out some of the photos I took of this yummy dish! Mmm...

Print Recipe

Ginger Beef, Mushroom & Kale Stir-Fry

This delicious ginger beef, mushroom, and kale stir fry is quick to make and full of great flavor!

Prep: 5 mins Cook: 25 mins Total: 30 mins

Ingredients:

Marinade Ingredients:

  • 1/3 cup soy sauce
  • 1/2 cup vegetable broth (or chicken/beef broth, or water)
  • 3 Tbsp. rice wine vinegar
  • 2 Tbsp. corn starch
  • 2 tsp. ground ginger
  • 1/4 tsp. freshly-ground black pepper

Stir-Fry Ingredients:

  • 1 lb. thinly sliced flank steak or sirloin, cut diagonally across the grain into thin strips
  • 2 garlic cloves, minced
  • 2 Tbsp. olive oil
  • 10 ounces baby portobello or button mushrooms, halved
  • 3 cups chopped kale
  • 2 green onions, thinly sliced

Directions:

To Make The Marinade:

Add all marinade ingredients to a bowl and whisk to combine. Pour marinade into a large bowl or ziplock bag, then add in the steak and gently toss to combine. Cover/seal and refrigerate for at least 15 minutes.

To Make The Stir-Fry:

Once steak has marinated, heat 1 Tbsp. oil in a large saute pan over medium-high heat. Remove steak from marinade with a slotted spoon, reserving the marinade, and add to saute pan with garlic. Saute for about 2-3 minutes until browned, stirring occasionally. Remove steak with a slotted spoon and set aside.

Add mushrooms, kale, and reserved marinade to saute pan, and stir to combine. Cook for 3-4 minutes, until the kale is wilted, the sauce has thickened, and the mushrooms have cooked, stirring regularly so that sauce does not burn. Add in the steak, and toss to combine.

Serve immediately over sticky rice, garnished with chopped green onions.

I think my favorite part after cooking is not to taste, but to relish with the idea of it while I photograph whatever dish I've just made. It makes the first bite that more enticing. I'm already salivating at the mouth just writing about it!

Alright, that's it! I have to dig in. Bon Appetit! :)

We hope everyone has a great weekend! Catch y'all on Monday, where we will be doing our first giveaway! Stay tuned to find out what it is and how to enter your chance to win! It's going to be oh so chic!

Love & xx's,

maQ + suz

Pasta Pasta Pasta!

This week's recipe is from one of my favorite Italian chefs, Lidia Bastianich! I have cooked so many of her recipes through the years and of course, I wanted to blog about my experience with one of her pasta recipes. 

This tomato-based rigatoni dish is perfection. With its deep blend of flavors from the sausage, the basil, and cheese, the zucchini and peperoncino flakes complete its magic in the pasta, giving it texture and an extra kick.

Print Recipe

Rigatoni with Sausage-Tomato Sauce

Serves 8

Ingredients

1 1/2 pounds sweet Italian sausage
1 cup white wine, divided
2 tablespoons extra-virgin olive oil, plus more for finishing the sauce
2 cups onions, chopped
1 garlic clove, peeled and sliced
1/2 teaspoon kosher salt, plus more for the pasta pot
1/2 teaspoon peperoncino flakes, or to taste
1 cup zucchini, diced
6 cups canned Italian plum tomatoes, preferably San Marzano, crushed by hand
1 branch fresh basil, with lots of leaves
1 pound rigatoni
1 cup Grana Padano, freshly grated, plus more for passing
 

Preparation

Remove the sausage casings, and crumble the meat into a large bowl. Pour 1/2 cup of the wine over the meat and mix this in with your fingers, breaking up any big meat clumps, so the sausage is evenly moistened.

Pour the olive oil into the big skillet and set it over medium heat. Stir in the onions and cook until they begin to soften, about 5 minutes. Scatter the sliced garlic in the pan and season with the salt and peperoncino. When everything is sizzling, crumble in the sausage and stir with the onions. Pour in the remaining 1/2 cup wine, raise the heat a bit and cook, stirring, as the wine cooks away and the sausage becomes all browned, about 10 minutes. Add in the diced zucchini and stir to incorporate. Pour in the tomatoes and a cup of water (which you’ve used to slosh and rinse the tomato cans and bowl). Submerge the basil branch in the liquid, cover the skillet and bring to a boil. Set the cover ajar, adjust the heat to keep the sauce bubbling steadily and cook for an hour or more, until the sauce has developed good flavor and reduced to the consistency you like for dressing pasta. Remove and discard basil branch. You can use some of the sauce right away—you’ll need half of it to dress the rigatoni—or let it cool, then refrigerate or freeze for later use.

For cooking and dressing the pasta, bring a large pot of well-salted water (at least 7 quarts water with 1 1/2 tablespoons kosher salt) to a rolling boil. Heat half the sausage-tomato sauce, about 4 cups, to a bare simmer in a wide skillet or sauté pan (if you’ve just made the sauce, use the same pan). If the sauce has cooled and thickened, loosen it with some of the pasta water. Add the rigatoni to the boiling water, and cook until just al dente.

Lift out the pasta in big bunches with a spider, let drain for a moment, then spill them into the simmering sauce. Over low heat, toss the rigatoni and sauce together for a minute or two, until all are coated and perfectly al dente. (Thin the sauce, if necessary, with hot pasta water or thicken it quickly over higher heat.) Turn off the heat, and sprinkle the grated cheese over the rigatoni and toss well. Finish with a drizzle of olive oil, toss again and heap the pasta in warm bowls. Serve immediately, passing more cheese at the table.

I love this recipe because it's quick and easy, and it's the ideal comfort food. Trust me when I say this, this pasta is really super delicious! I was salivating while shooting the photos- I couldn't stand to wait and eat it! Don't forget the wine and bread! I know some of you will think I'm bonkers for having bread with pasta, but I grew up eating like this and I love it. So extra yummy when you dip it in the sauce! ;P

Lastly, for a really adorable, entertaining video of Lidia, Rachel Ray and Nate Berkus working in the kitchen on this recipe, click here for lots of laughs and more! Seriously, Nate... you and the sausage! OMG! HA HA HA!

Until next time, have a great weekend everybody!

Love & xx's,

maQ + suz

Let's connect!